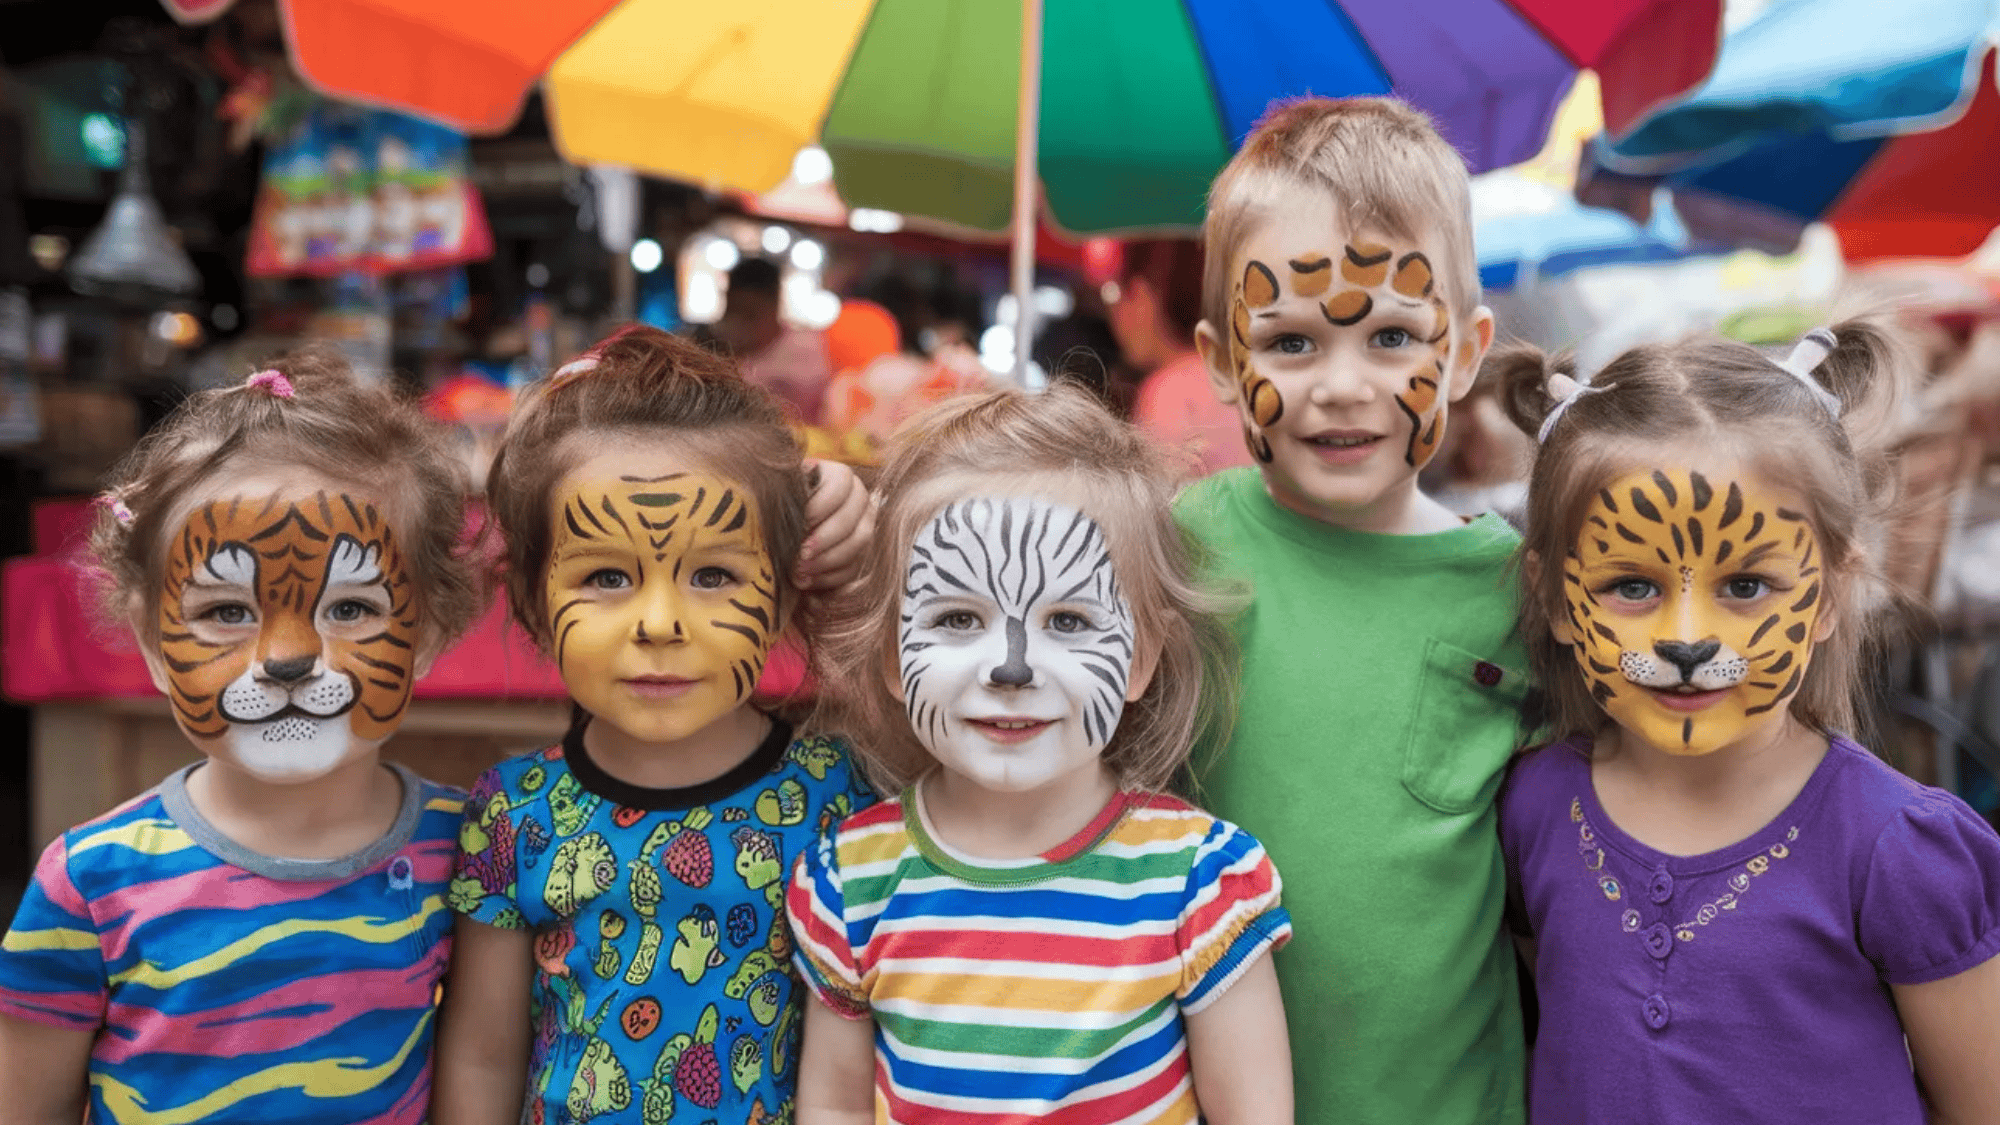

Every kid at a party wants their face painted. It’s one of those things that never gets old, but coming up with fresh designs on the spot? That’s where things get tricky.
This guide is packed with easy face-painting ideas for kids that actually work, whether you’re a complete beginner or someone who’s done it a few times and wants to level up.
From simple animals to bold fantasy looks, there’s something here for every skill level. By the end, you’ll have great ideas ready to go, plus tips to help you pull them off with confidence.
What You Need Before You Start Face Painting
Before jumping into any design, it helps to have the right supplies on hand. Scrambling for a brush mid-session is no fun, especially with an impatient kid in the chair.
| Supply | What It Does | Quick Tip |
|---|---|---|
| Face Paint | The base of every design. Water-activated paints are easiest for beginners and wash off without much fuss. | Cream-based options last longer and hold up better outdoors, but take a little more practice to blend. |
| Brushes | A round brush handles detail work, a flat brush fills larger areas, and a fine-liner gets you sharp, clean edges. | Having all three on hand means you won’t have to compromise on any design. |
| Sponges | Great for applying base colors quickly and evenly across larger areas. | They also blend two colors for a softer, more natural-looking transition. |
| Setting Powder or Spray | A light dusting or spritz after the design is done helps it last longer, especially on active kids. | Reduces smearing and keeps colors looking fresh throughout the event. |
| Mirror | Keeps kids entertained and lets them watch the transformation happen in real time. | It also keeps them less likely to move around while you’re working. |
| Water and Paper Towels | Essential for rinsing brushes between colors and wiping up mistakes quickly. | Keeping these close saves a lot of back-and-forth during the session. |
Popular Easy Face Painting Ideas for Kids
These ideas are perfect for sparking creativity and adding fun to any occasion. From animal faces to superhero masks, there’s a design for every little imagination to find.
1. Butterfly Face Paint

Butterfly face paint is one of the most requested designs at any kids’ event. The wing shapes frame the face beautifully, and you can go as simple or as detailed as you like.
- Sponge a light base color across both cheeks and the nose bridge
- Use a flat brush to paint large wing shapes extending from the eyes outward toward the temples
- Outline the wings in black using a fine-liner brush
- Add dots, swirls, or small details inside the wings
- Paint a small body shape along the nose
Tip: Use two contrasting colors on each wing for a more vibrant effect.
2. Spider-Man Face Paint
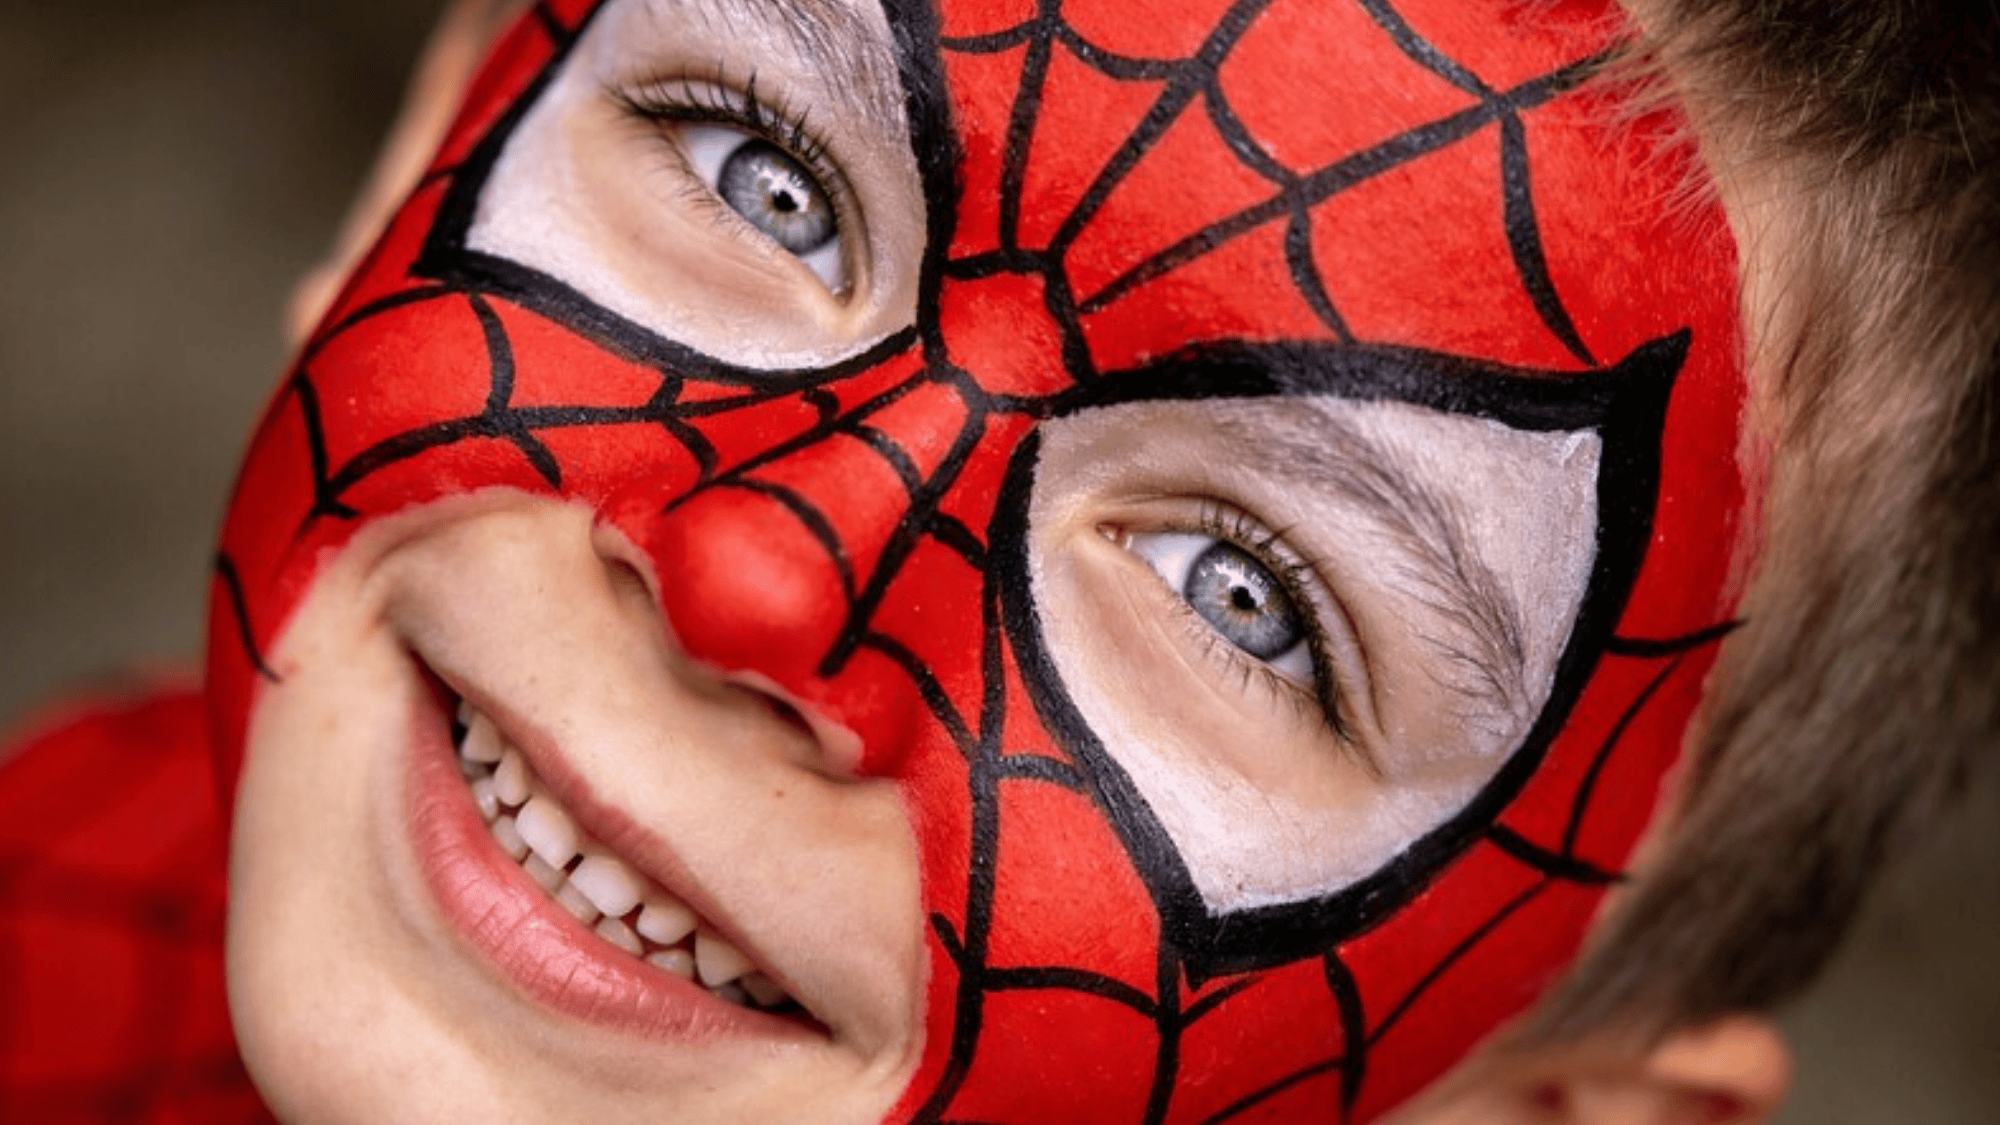
Spider-Man is a guaranteed hit with younger kids. The design is mostly red and black, making it beginner-friendly and requiring few colors. Keeping the web lines symmetrical is the only tricky part, but a light pencil guide before painting helps a lot.
- Sponge a bold red base across the entire face.
- Use a fine-liner brush to draw thin black web lines radiating outward from the nose
- Connect the lines with curved crosshatches to complete the web pattern
- Outline large white eye shapes over the eyes
- Edge the white eyes with black for definition
Tip: Start the web lines from the nose bridge and work outward to keep them evenly spaced.
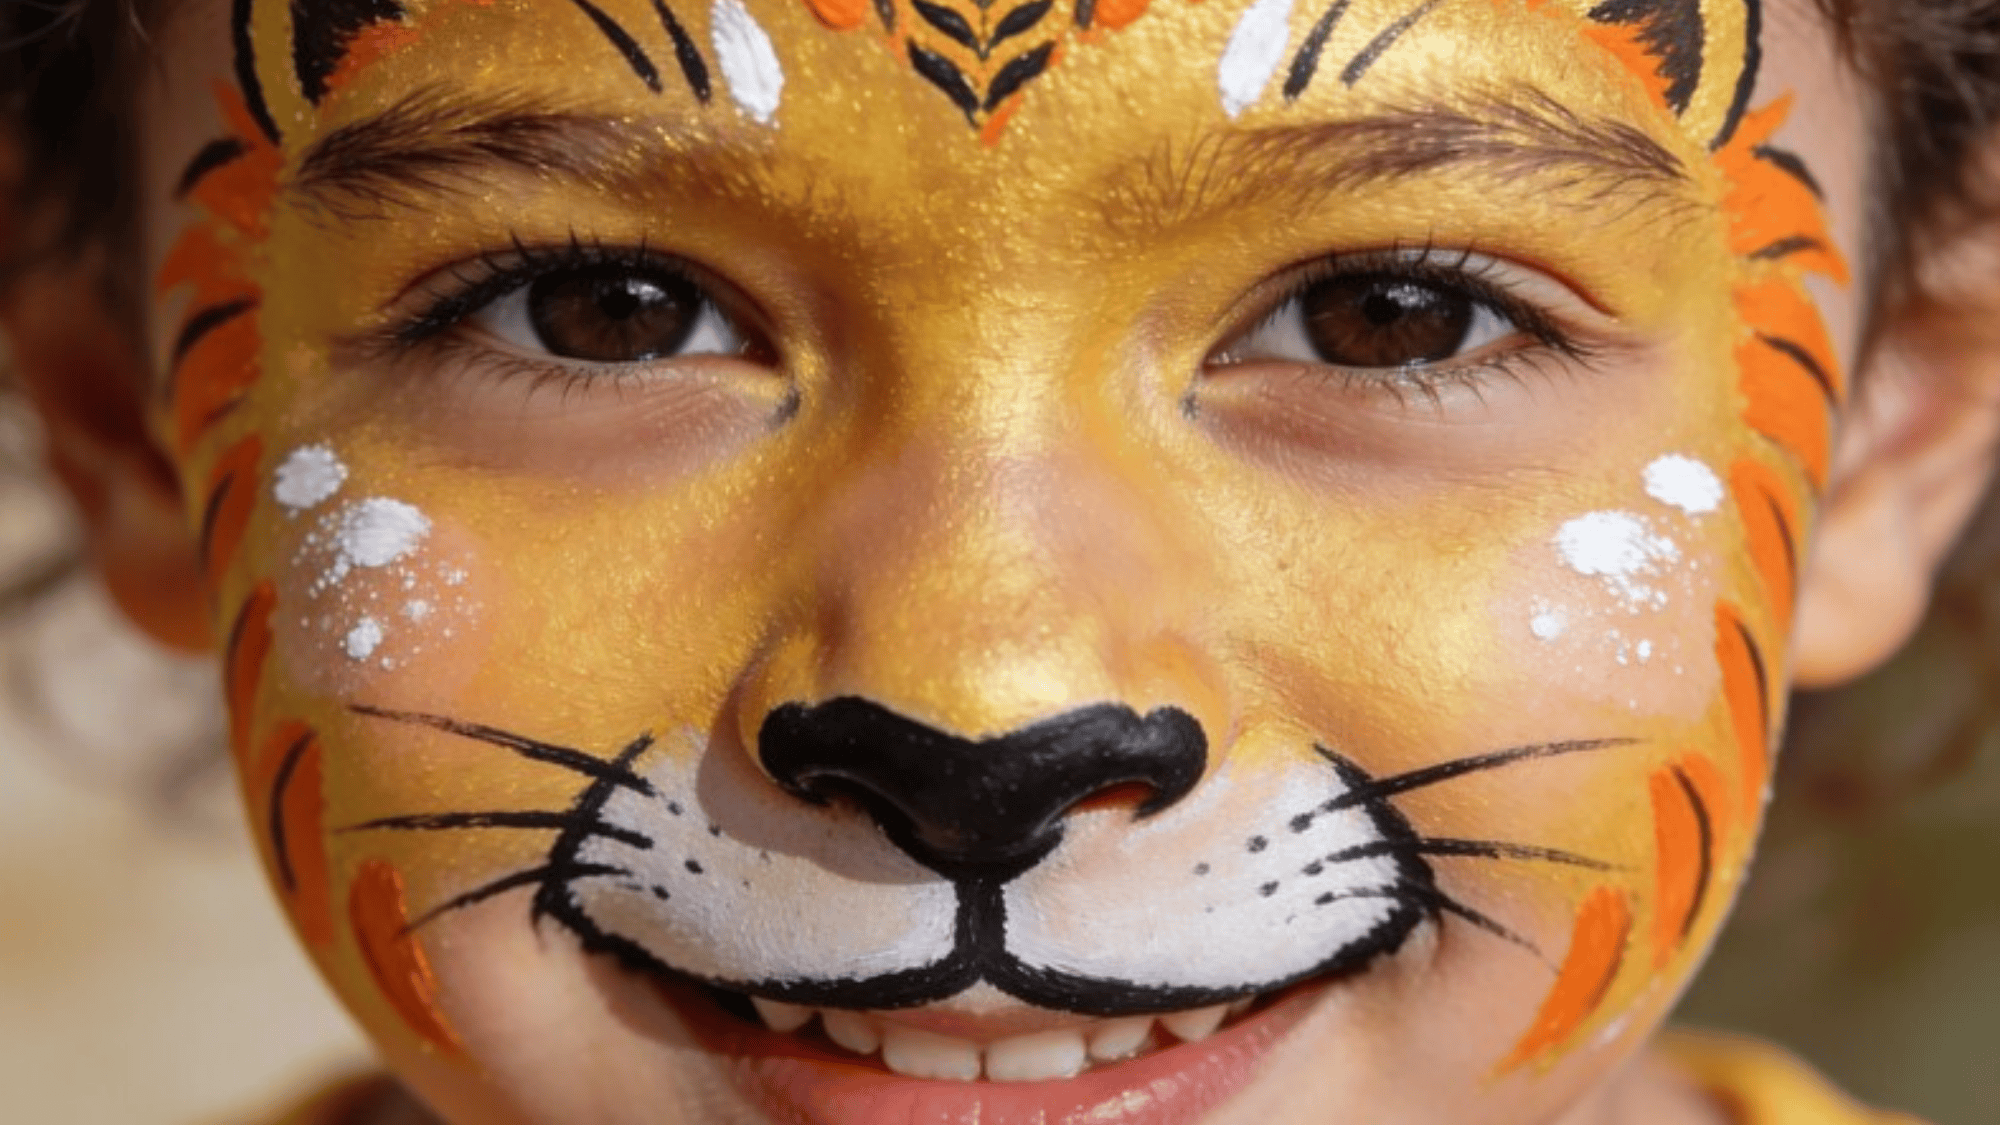
3. Tiger Face Paint
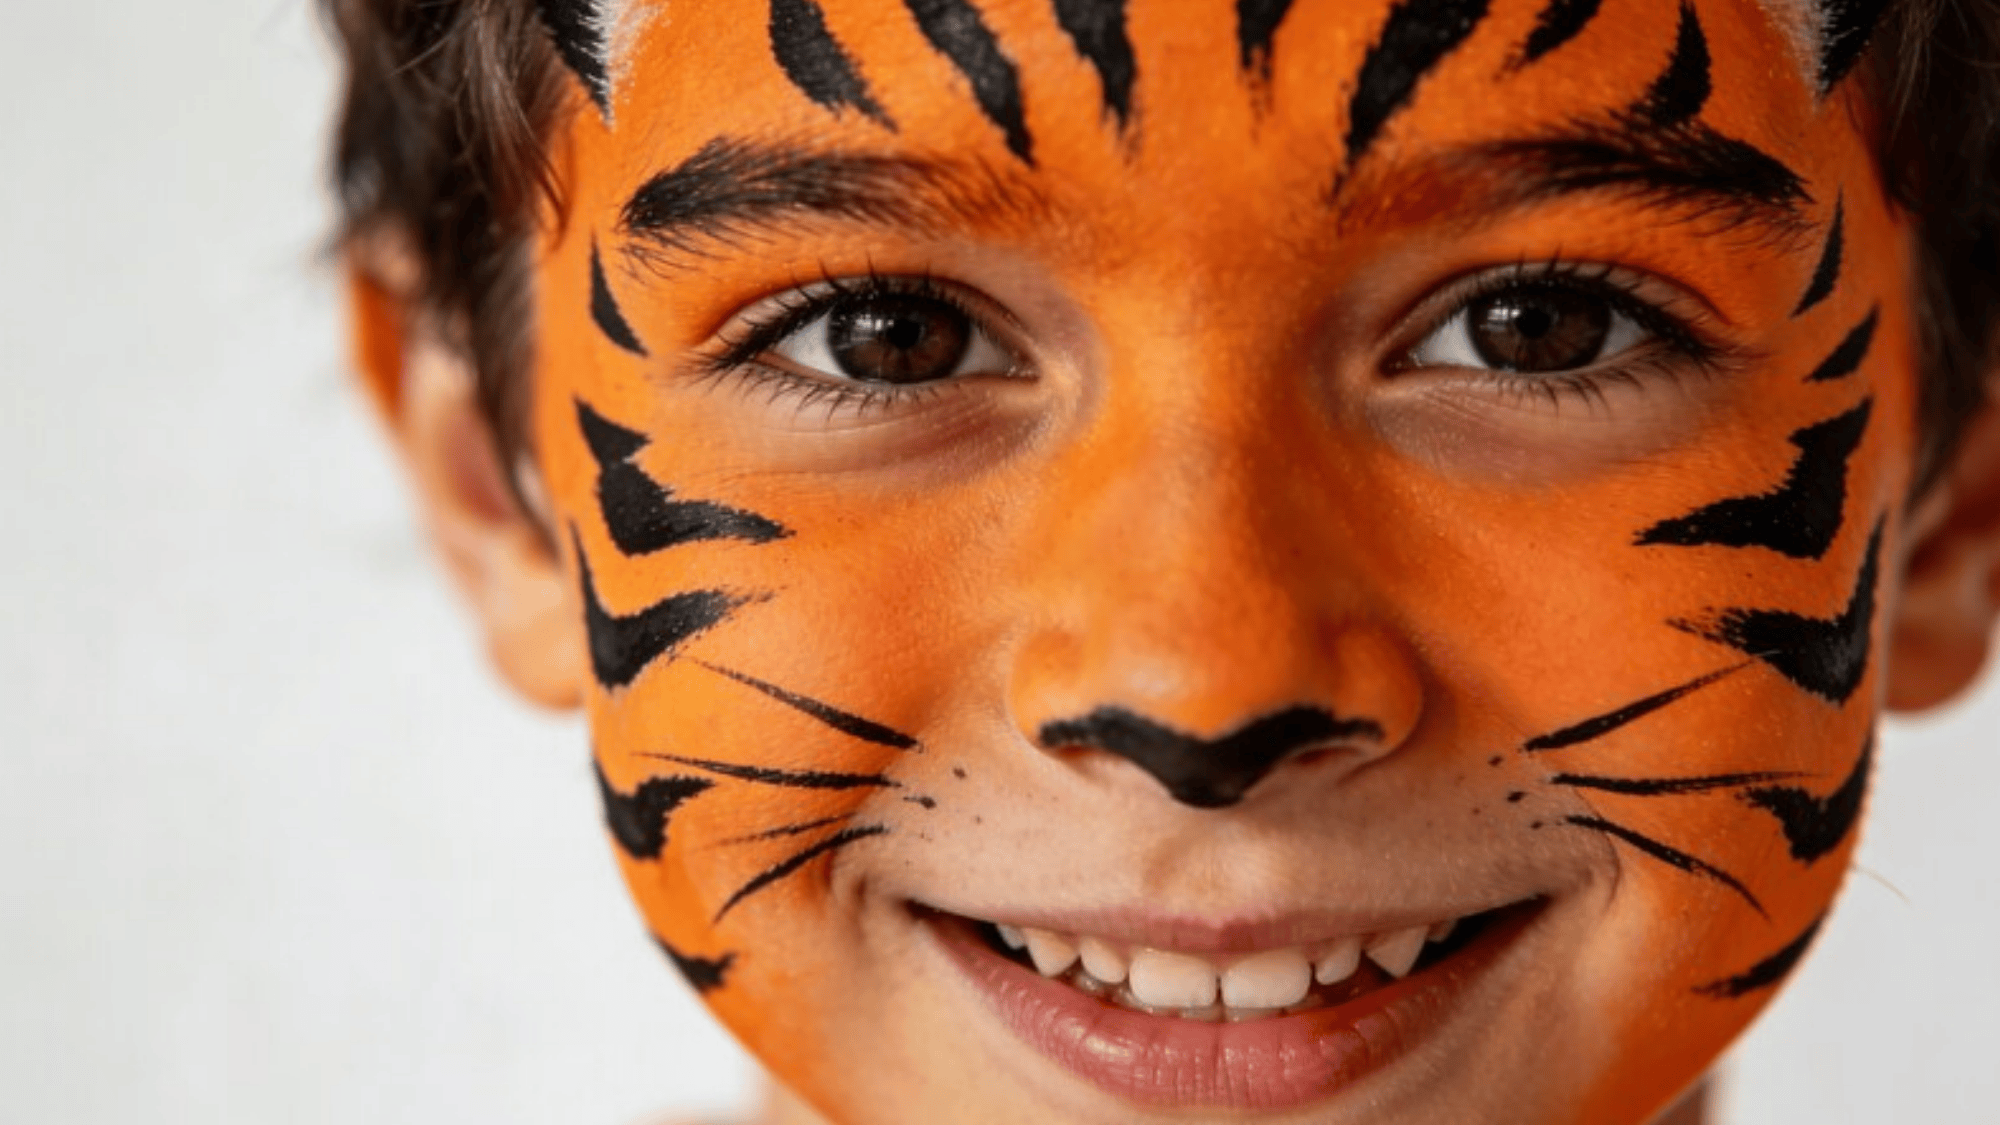
Tiger face paint is bold, striking, and surprisingly quick to do. The orange-and-black combination is instantly recognizable, and the stripe pattern gives you some creative freedom. It works well for both boys and girls and suits a wide range of ages.
- Sponge an orange base across the forehead, cheeks, and nose
- Use a flat brush to paint black stripes across the forehead and cheeks
- Paint a black nose on the tip of the nose
- Add whisker dots and fine stripes near the mouth using a fine-liner
Tip: Slightly curve the stripes to follow the natural contours of the face for a more realistic look.
4. Cat Face Paint
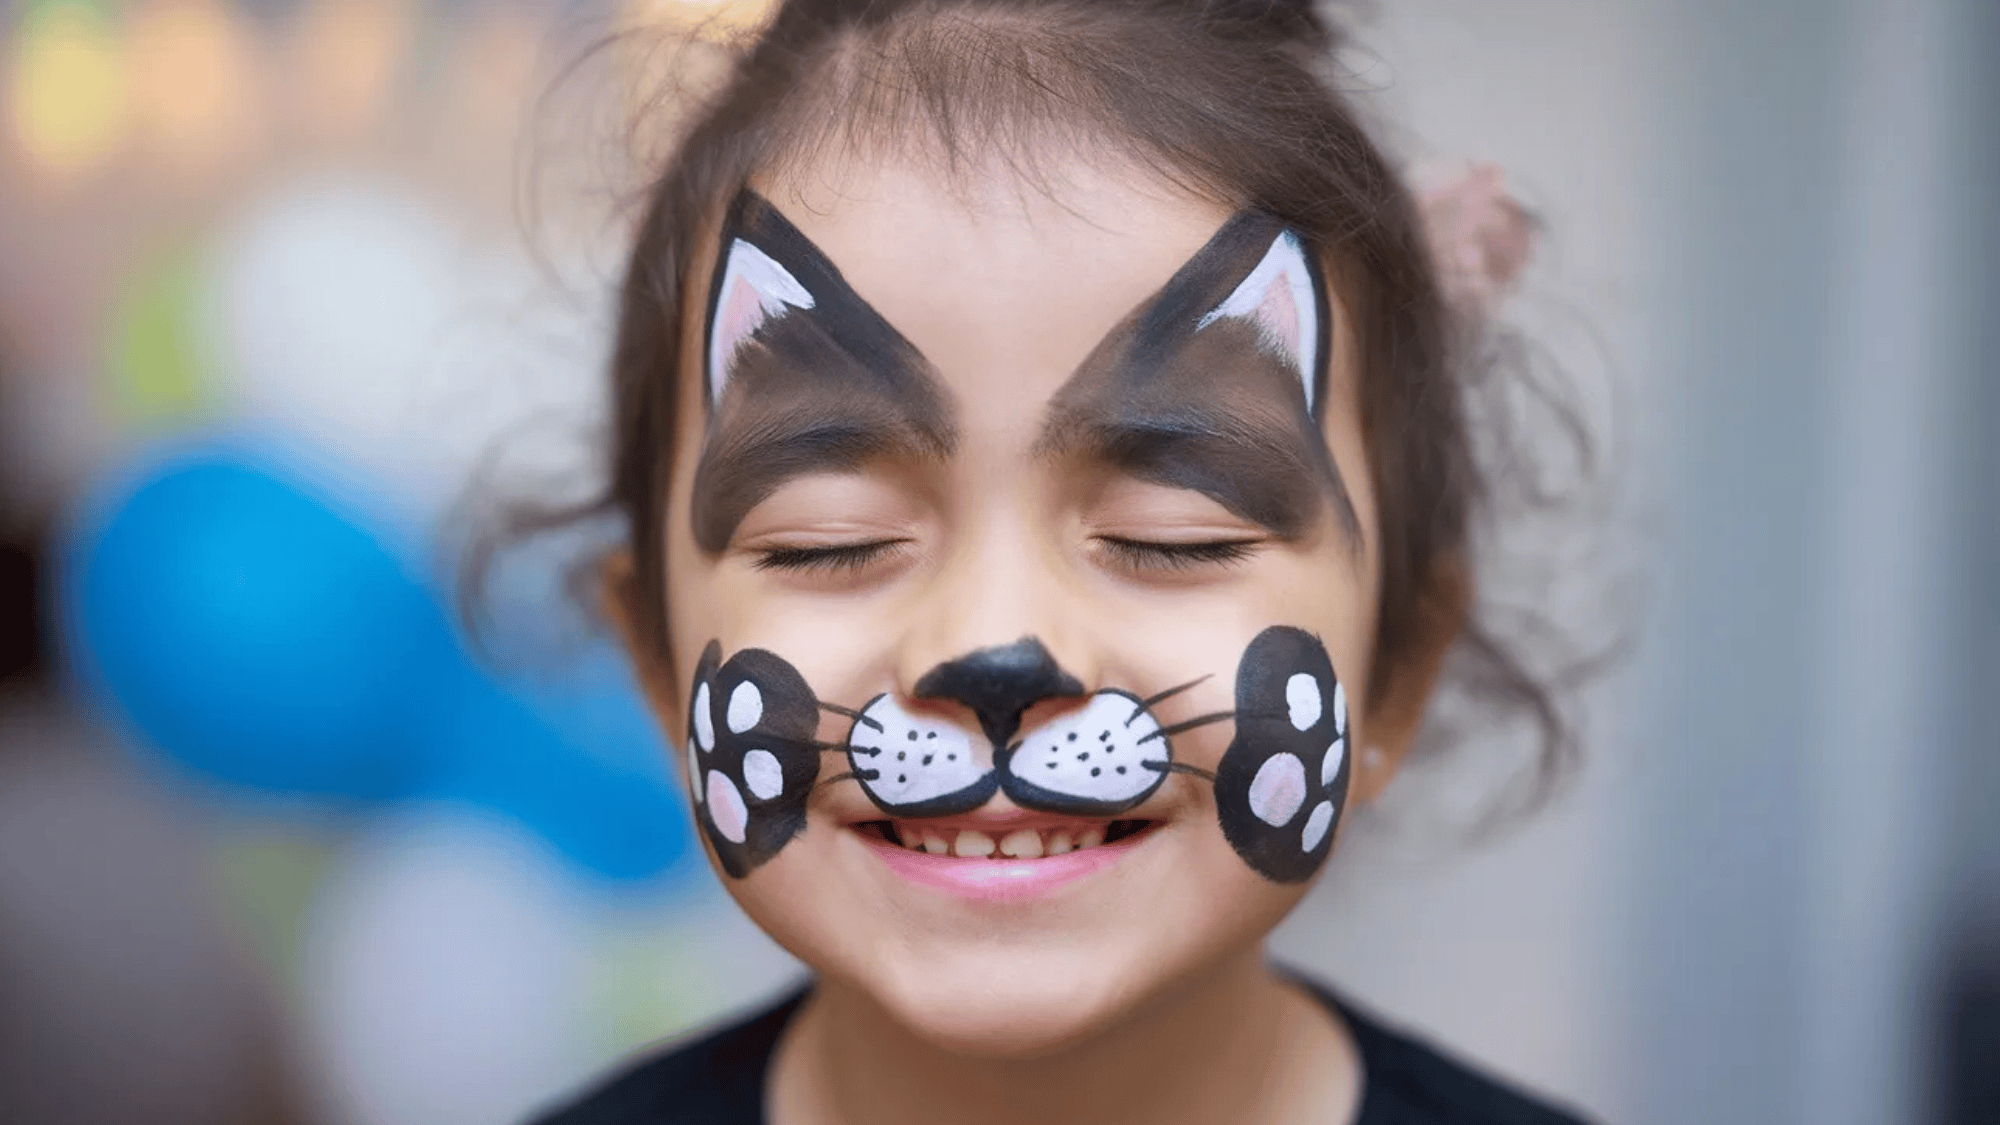
Cat face paint is one of the simplest designs out there, which makes it perfect for beginners. It needs very few colors and takes only a few minutes to complete. Despite being simple, it always looks great, and kids absolutely love it.
- Sponge a base color across the cheeks if desired, or skip for a minimal look
- Paint a small black or pink nose triangle on the tip of the nose
- Draw a line from the nose down to the upper lip using a fine-liner
- Add three whisker lines on each cheek
- Draw small cat ear outlines on the forehead if desired
Tip: Adding a little shimmer or glitter to the cheeks gives it a more magical, dressed-up feel.
5. Dog Face Paint
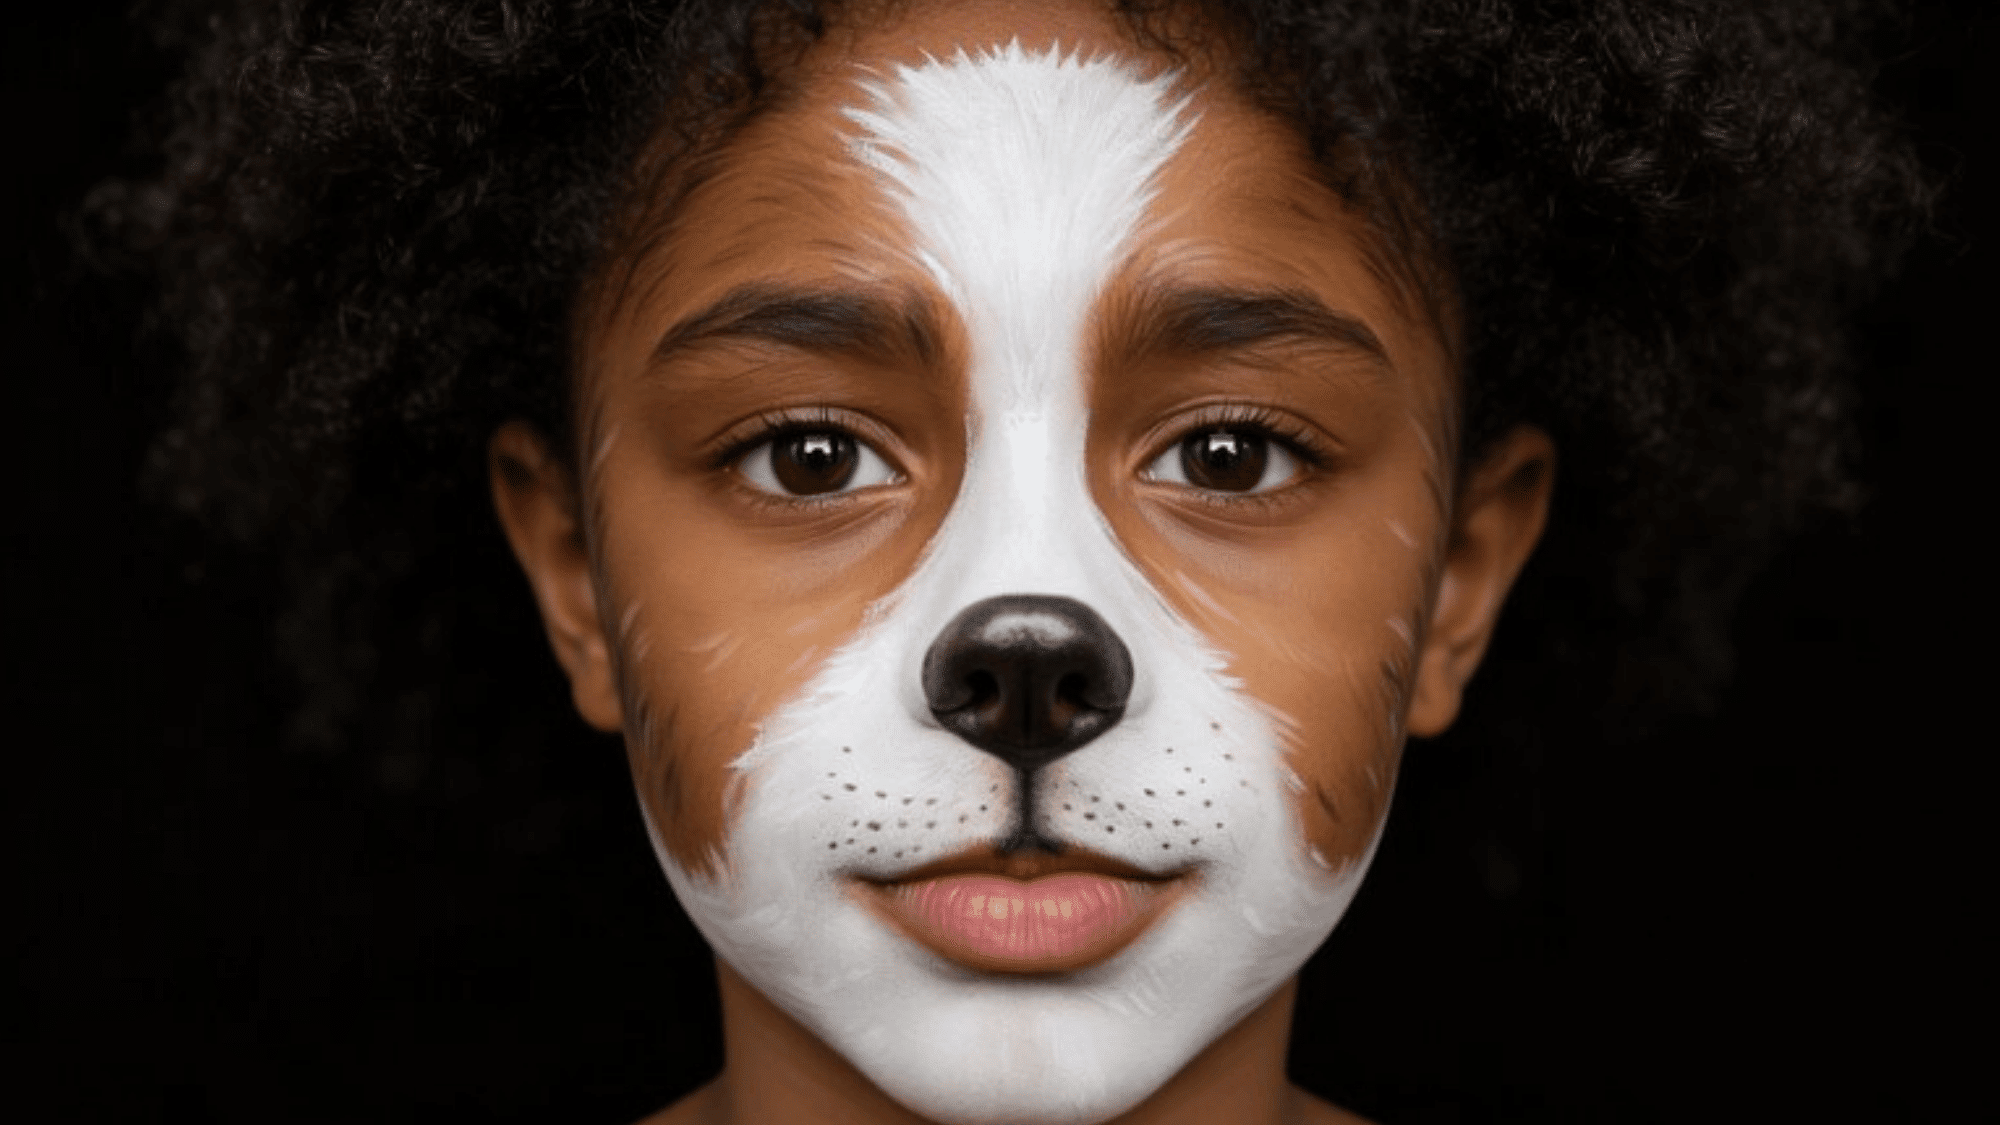
Dog face paint is playful, easy, and works for almost any age. You can adapt it to look like any breed by switching up the colors. Brown, white, and black are the most common combinations, and the floppy ear details make it look instantly recognizable.
- Sponge a light brown or tan base across the nose and cheek area
- Add a large dark oval nose on the tip of the nose
- Draw a wide, friendly mouth curving downward from the nose
- Add small dots above the mouth for whisker spots
Tip: Use a darker shade of brown to add shading around the ears and muzzle for more depth.
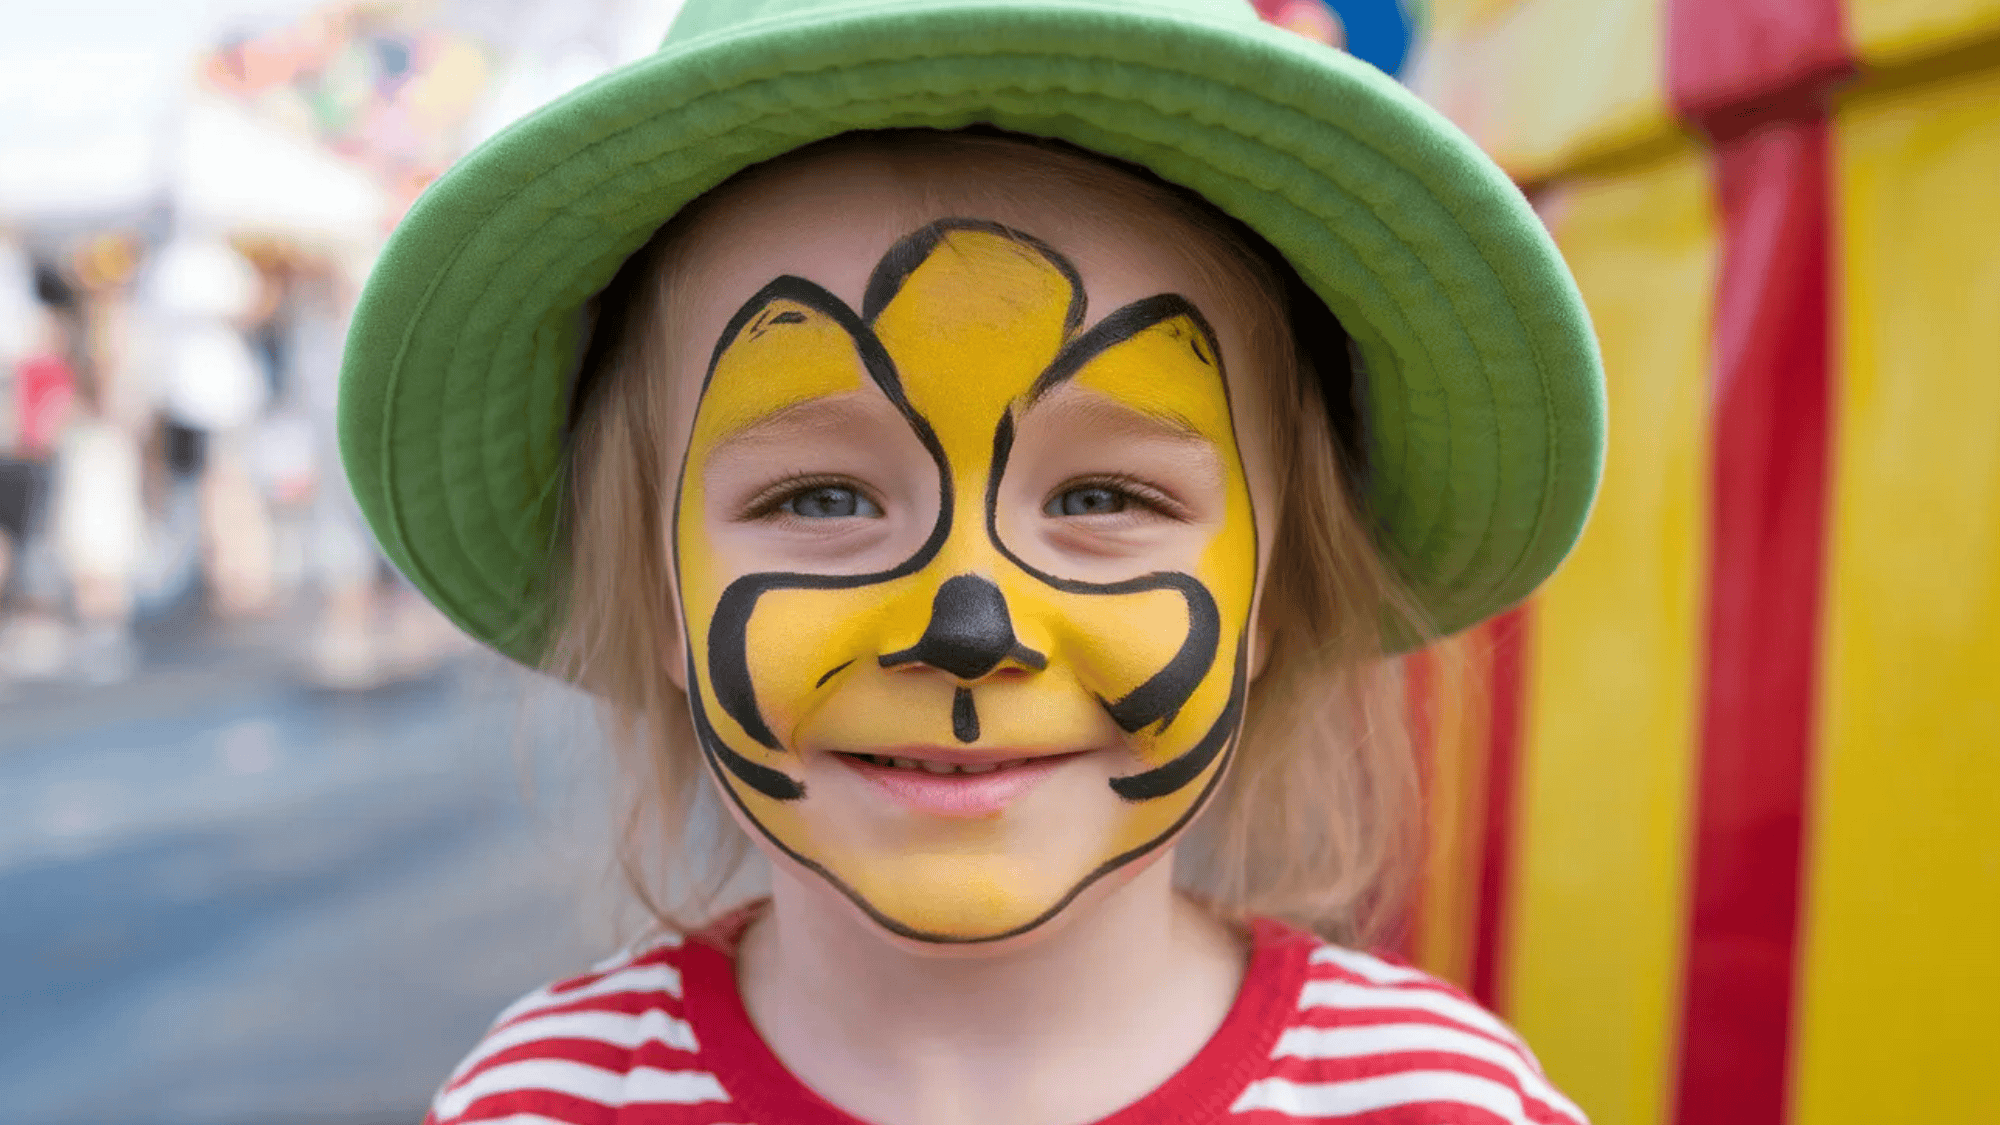
6. Lion Face Paint
Lion face paint looks impressive, but comes together faster than most people expect. Golden yellows and warm oranges are the go-to colors, and the result always looks bold and fierce.
- Sponge a golden yellow base across the full face
- Use a sponge or flat brush to dab orange and brown around the outer edges of the face
- Paint a wide, flat nose on the tip of the nose in dark brown
- Add a line from the nose to the upper lip and curve it outward
- Draw short fur-like strokes around the mane area using a fine-liner
Tip: Add a few white highlights on the cheekbones to make the face appear more three-dimensional.
7. Superhero Mask

A generic superhero mask is a great design when you want something bold without committing to a specific character. It works as a standalone look or as a base that kids can build on with their imagination. Pick any color to match a favorite hero or go with what looks good.
- Choose a base color for the mask: red, blue, green, or black. All work well
- Paint a symmetrical mask shape around both eyes using a flat brush
- Extend the mask outward to the temples and slightly down the cheeks
- Outline the mask sharply with black using a fine-liner
- Add a small emblem or star on the forehead if desired
Tip: Use a stencil for the mask outline to achieve perfectly even edges on both sides.
8. Princess Crown Face Paint
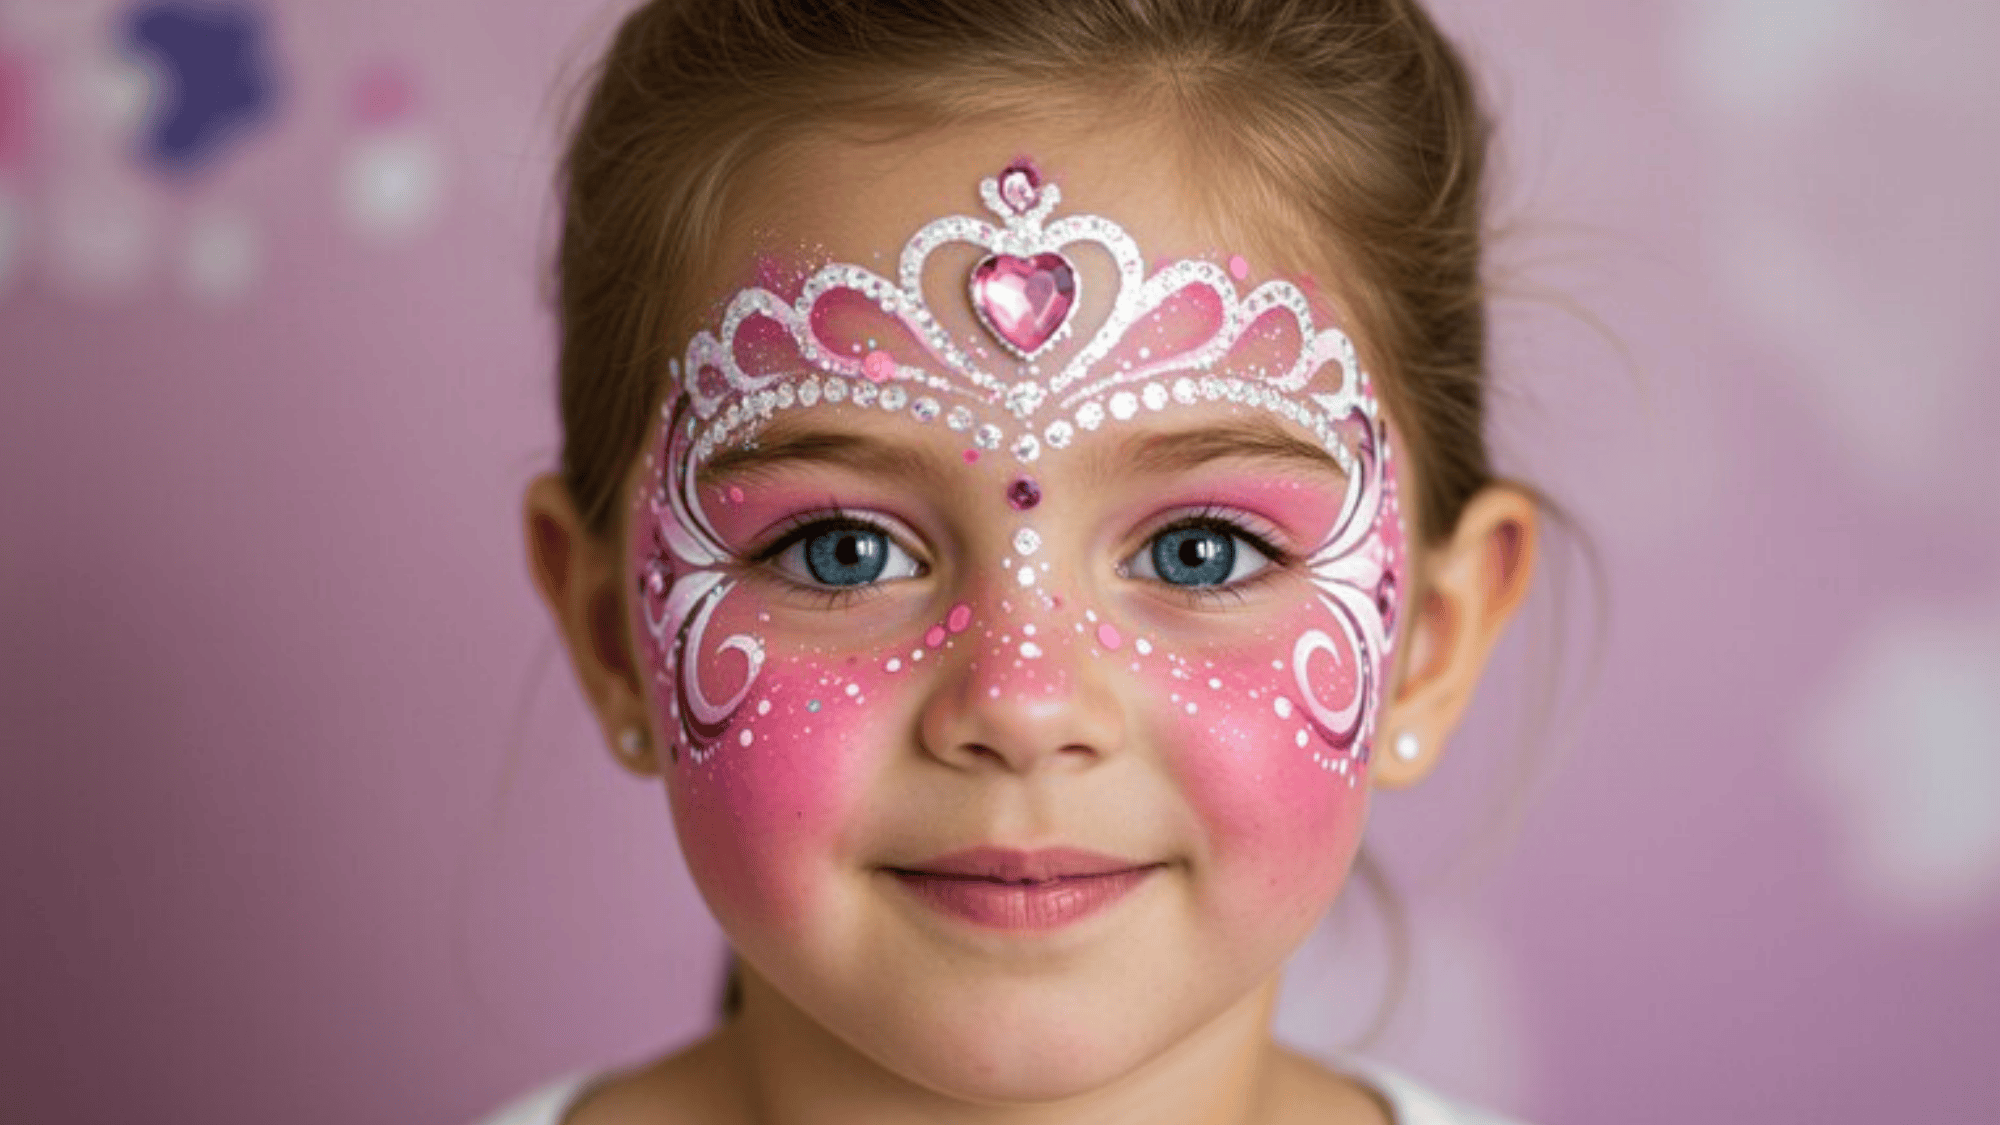
Princess crown face paint is delicate, pretty, and endlessly customizable. It works beautifully with pinks, golds, and purples, and adding a little glitter takes it to the next level. This one is especially popular at birthday parties and dress-up events.
- Sketch a crown shape lightly across the forehead with a brush
- Fill in the crown using silver paint and a flat brush
- Outline the crown sharply in a darker shade or black
- Add gem shapes inside the crown using bright colors like pink, purple, or blue
- Scatter small stars or dots around the crown for a magical finishing touch
Tip: A touch of cosmetic glitter on the gems makes the crown look more realistic and sparkly.
9. Unicorn Face Paint
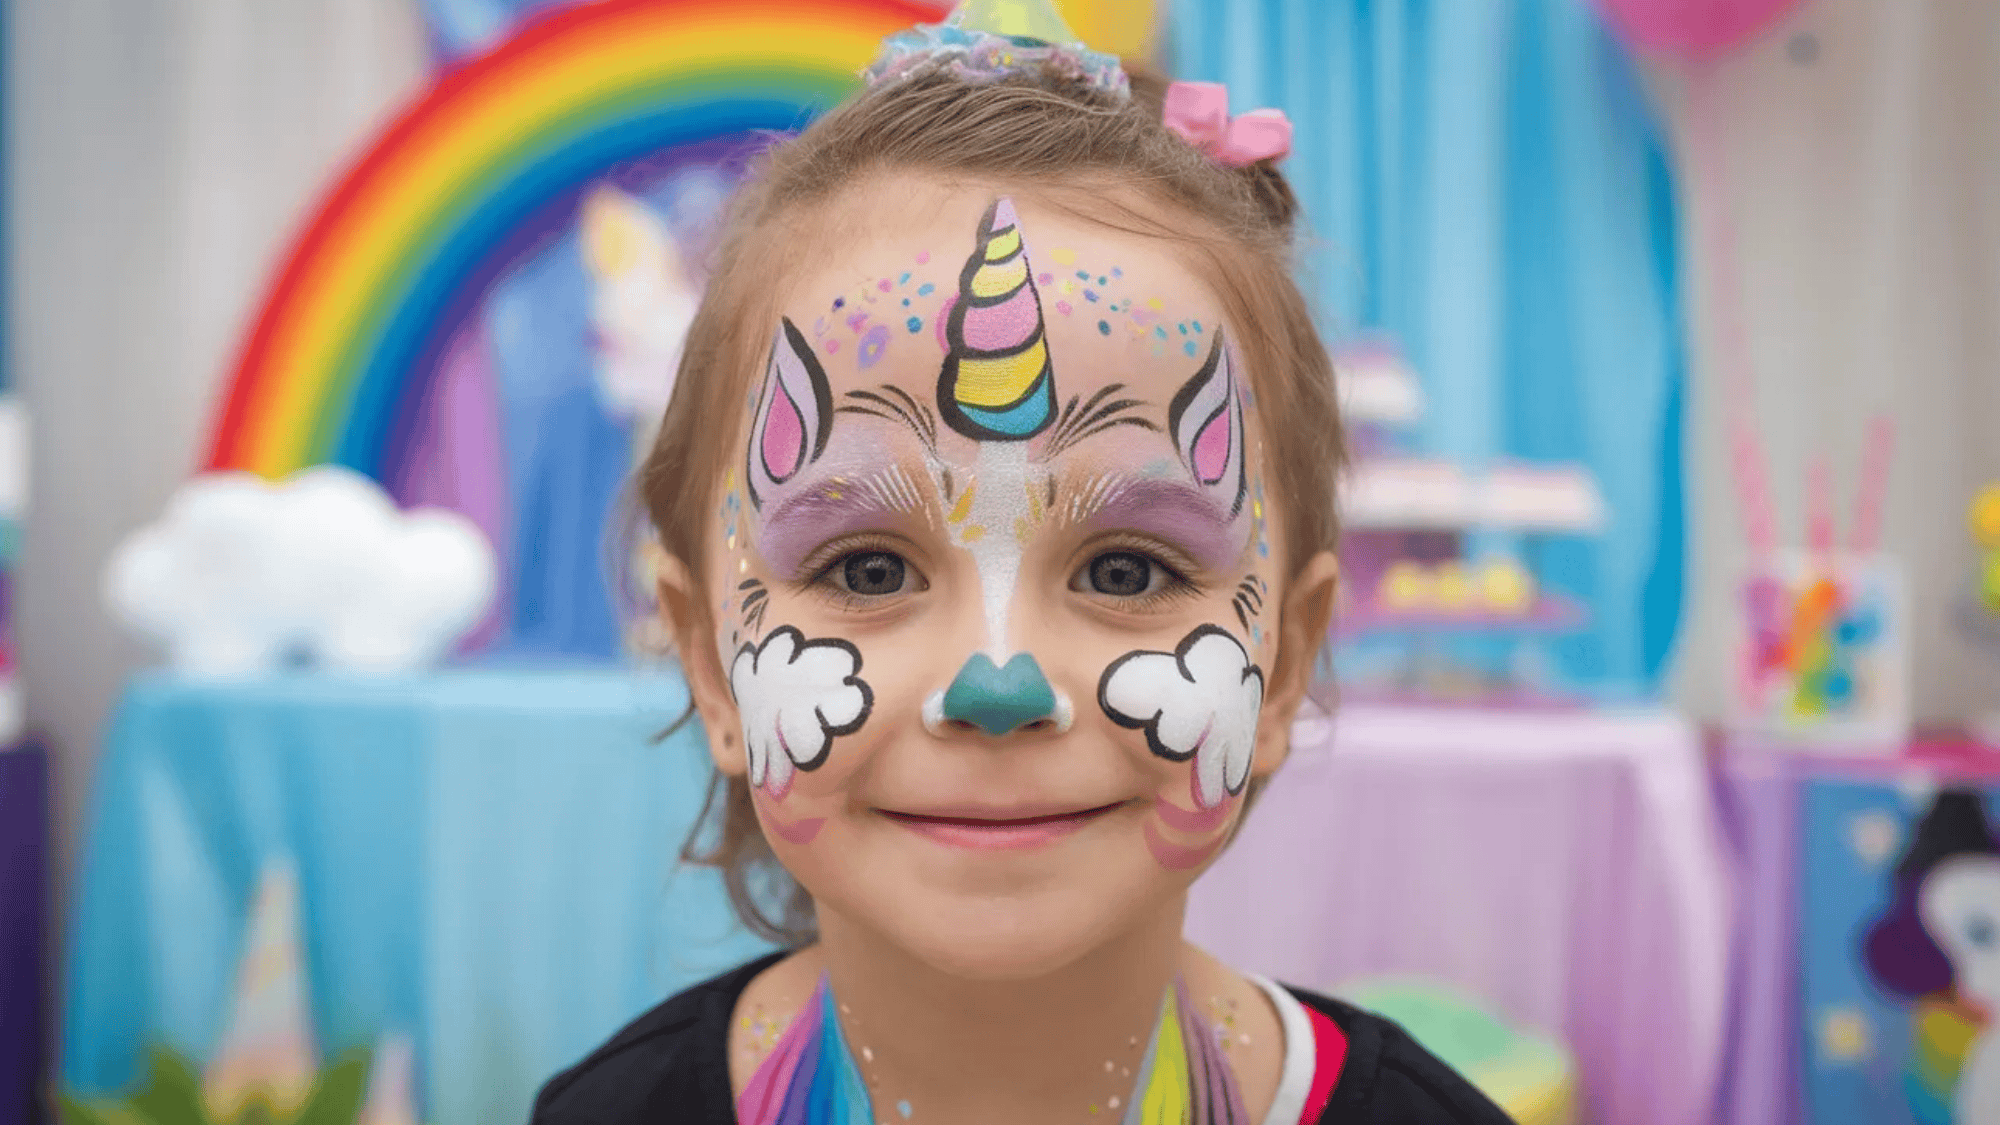
Unicorn face paint is one of the most popular designs for girls, but honestly, it works for any kid who loves a bit of magic. The horn is the centerpiece, and pastel colors across the cheeks tie the whole look together. Glitter is basically mandatory here.
- Paint a spiral horn shape on the forehead in gold or white using a fine-liner or round brush
- Sponge soft pastel colors like pink, lavender, and light blue across the cheeks
- Add small flower or star details near the temples
- Draw delicate swirls or dots around the horn
- Finish with cosmetic glitter over the cheeks and horn
Tip: Blend two or three pastel colors on the cheeks using a damp sponge for a dreamy gradient effect.
10. Dinosaur Face Paint
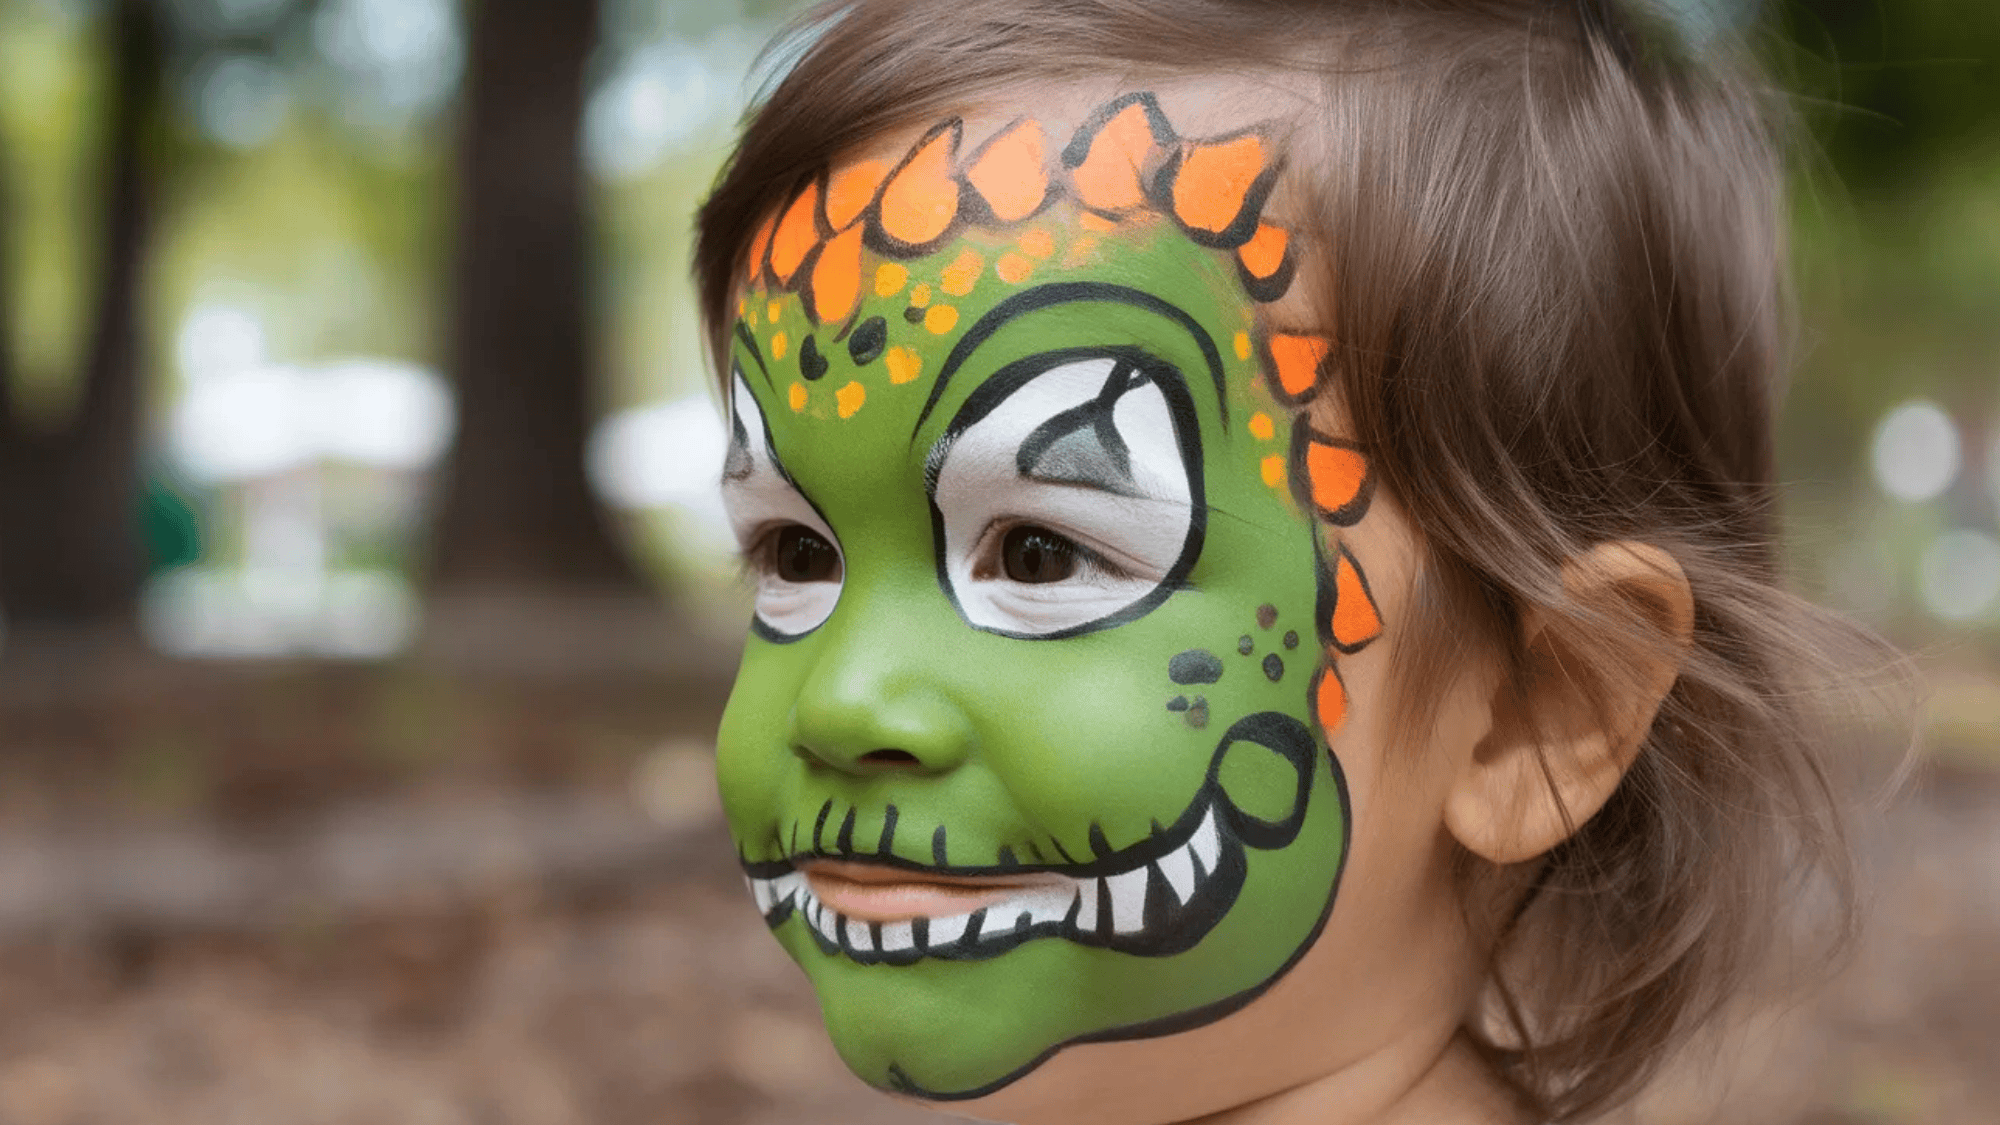
Dinosaur face paint is fun, a little fierce, and endlessly popular with younger kids. You can keep it simple with scales and a snout, or go more detailed with spikes and textures. Green is the obvious go-to, but purple or blue dinosaurs are just as cool.
- Sponge a green base across the forehead, nose, and cheeks
- Use a darker green to paint scale-like shapes across the forehead and cheeks
- Paint a reptilian eye design above the brows using black and yellow
- Add jagged spike shapes along the forehead hairline
Tip: Adding a lighter green highlight down the center of each scale gives them a more textured, three-dimensional look.
11. Zombie Face Paint
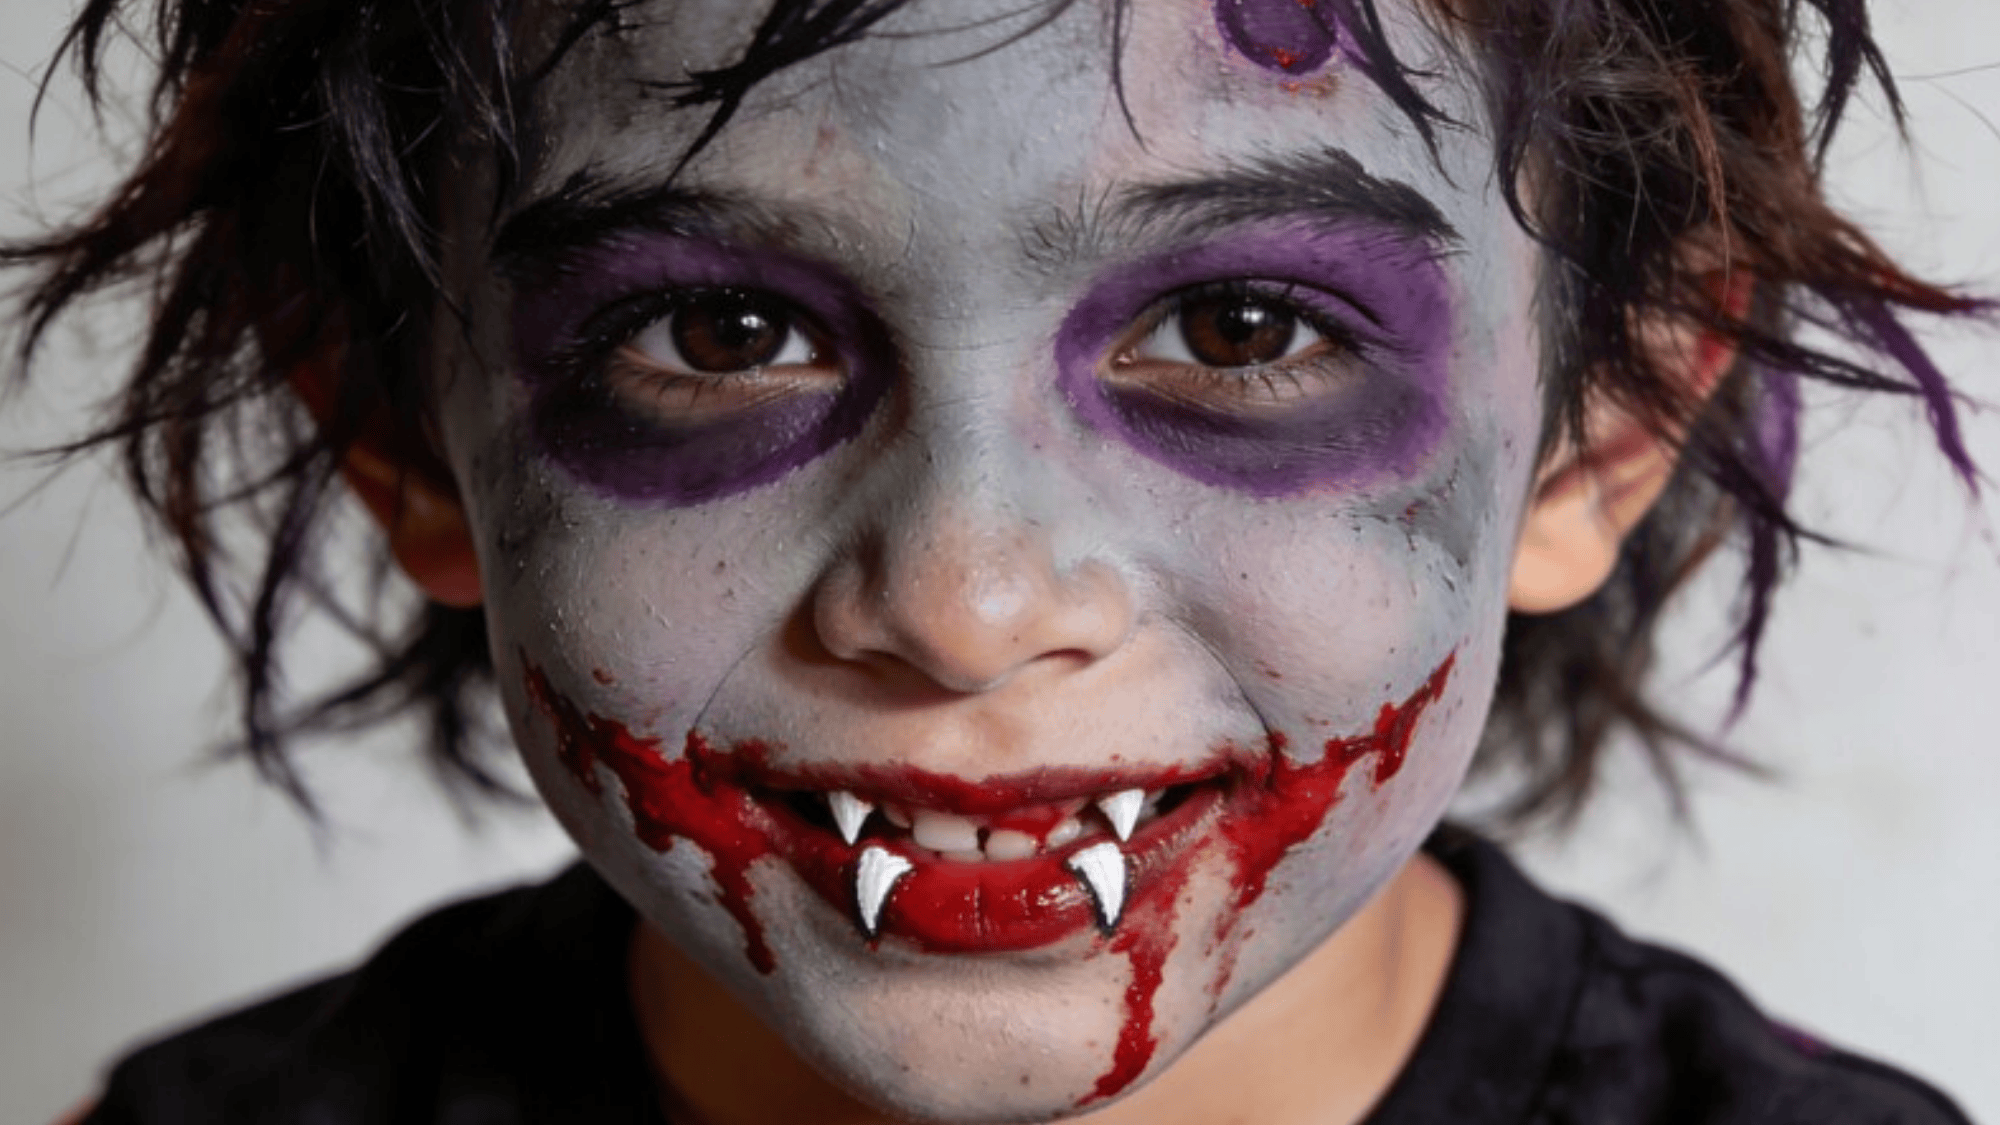
Zombie face paint is a Halloween staple and one of the most creative designs on this list. The beauty of it is that it doesn’t need to be perfect; the messier and more distressed it looks, the better. This one is great for older kids who want something dramatic.
- Sponge a pale gray or greenish-white base across the whole face
- Add dark purple and gray shadow patches under the eyes and around the temples
- Use a fine-liner to draw stitching or wound details on the cheeks or forehead
- Dab dark red around the wound edges to suggest dried blood
- Add cracked skin lines using a fine-liner brush in dark gray
Tip: A small sponge dabbed with dark red near the mouth or chin adds a gruesome but effective final detail.
12. Witch Face Paint
Witch face paint can go in a few different directions depending on the age and preference of the child. A classic green-skinned witch is always fun, but a more glamorous dark fantasy version works just as well. Either way, dramatic eyes and bold colors are the key.
- Sponge a pale base across the entire face for a classic witch look
- Darken the eye area with purple or black shadow using a sponge
- Draw exaggerated arched brows using a fine-liner
- Add wart details or cracked skin lines on the nose or chin
- Paint dark lips or swirling patterns on the cheeks to complete the look
Tip: For an older kid, skip the green base and go with dramatic black-and-purple eye details over a pale base instead.
13. Mermaid Face Paint
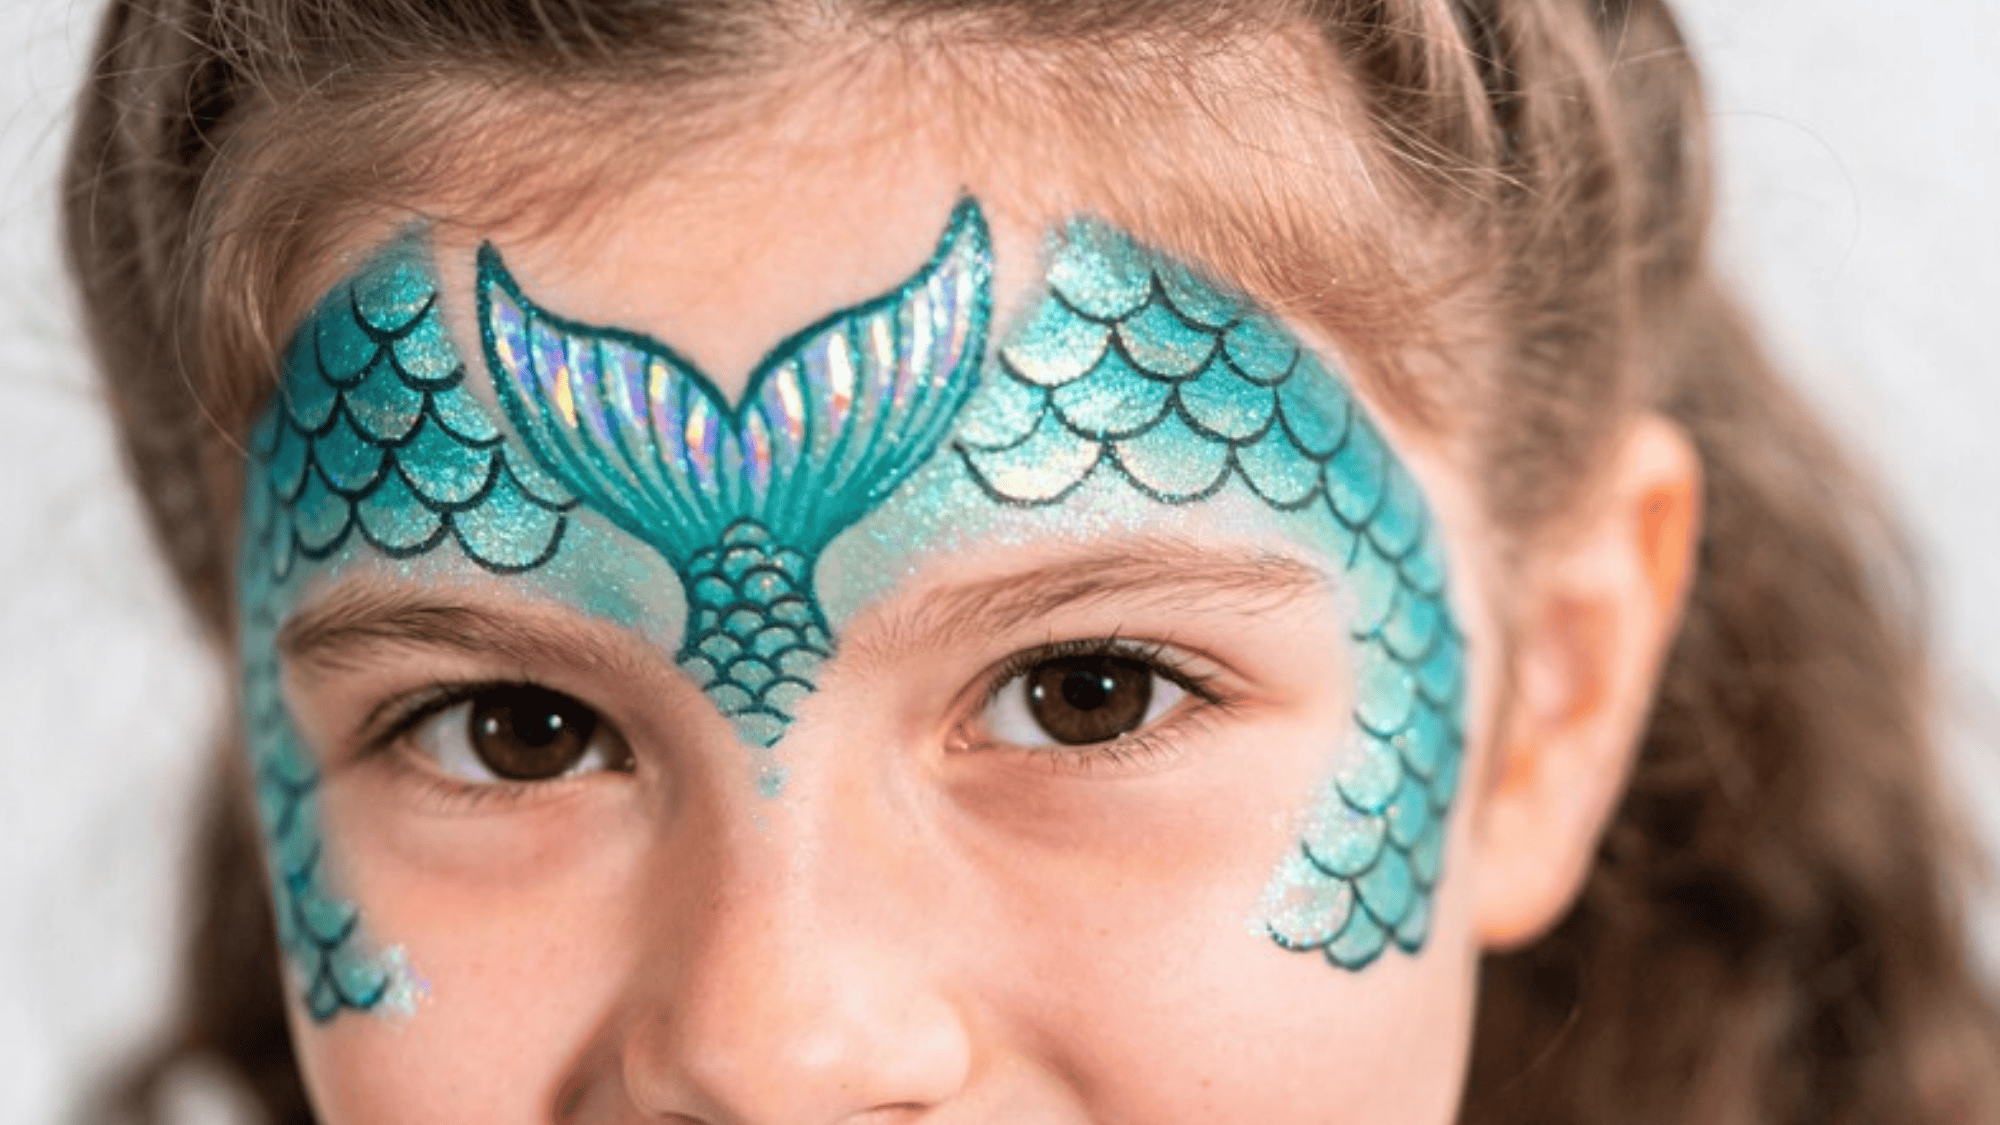
Mermaid face paint is dreamy, colorful, and gives you a lot of creative freedom. Scales, shells, and ocean colors are the building blocks, and there’s no single right way to put them together. Blues, teals, and purples are the most popular color choices, but coral and pink work beautifully, too.
- Sponge a teal or blue base lightly across the cheeks and forehead
- Add scales and mermaid details near the temples
- Paint a mermaid fin design along the forehead
- Finish with iridescent glitter or pearl shimmer over the scales
Tip: Using a small circular sponge or the tip of a makeup sponge to stamp scales is much faster than painting each one individually.
14. Pirate Face Paint
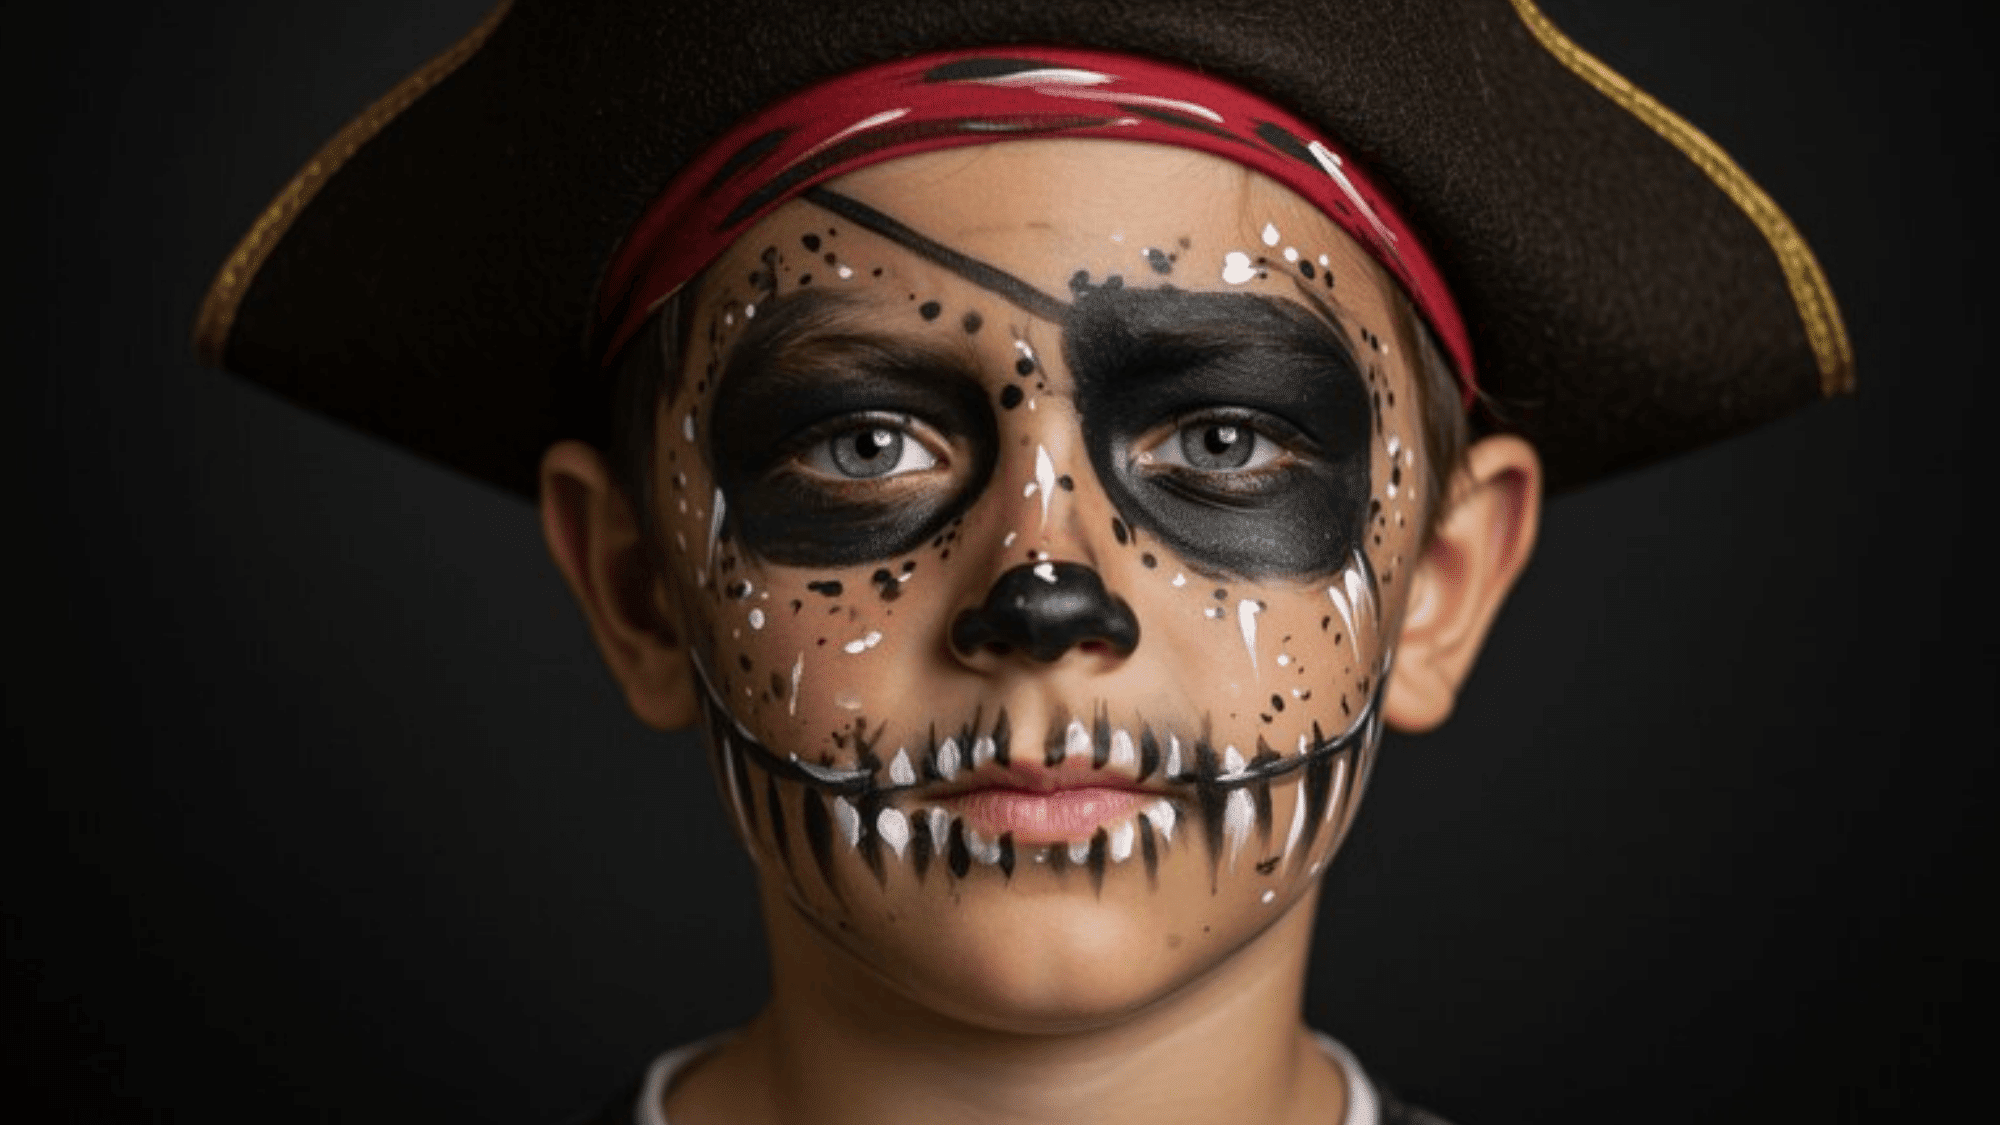
Pirate face paint is quick, bold, and works brilliantly for both boys and girls. The classic eye patch is the signature element, and everything else builds around it. It’s one of the fastest designs on this list without looking rushed.
- Paint a black eye patch shape over one eye using a flat brush
- Add a thin strap line extending from the patch toward the ear
- Draw a small skull and crossbones inside the patch using white paint
- Add a scar line on the mouth using white and black
Tip: A little stubble effect on the chin using a dry sponge dabbed with gray paint adds a rugged finishing touch.
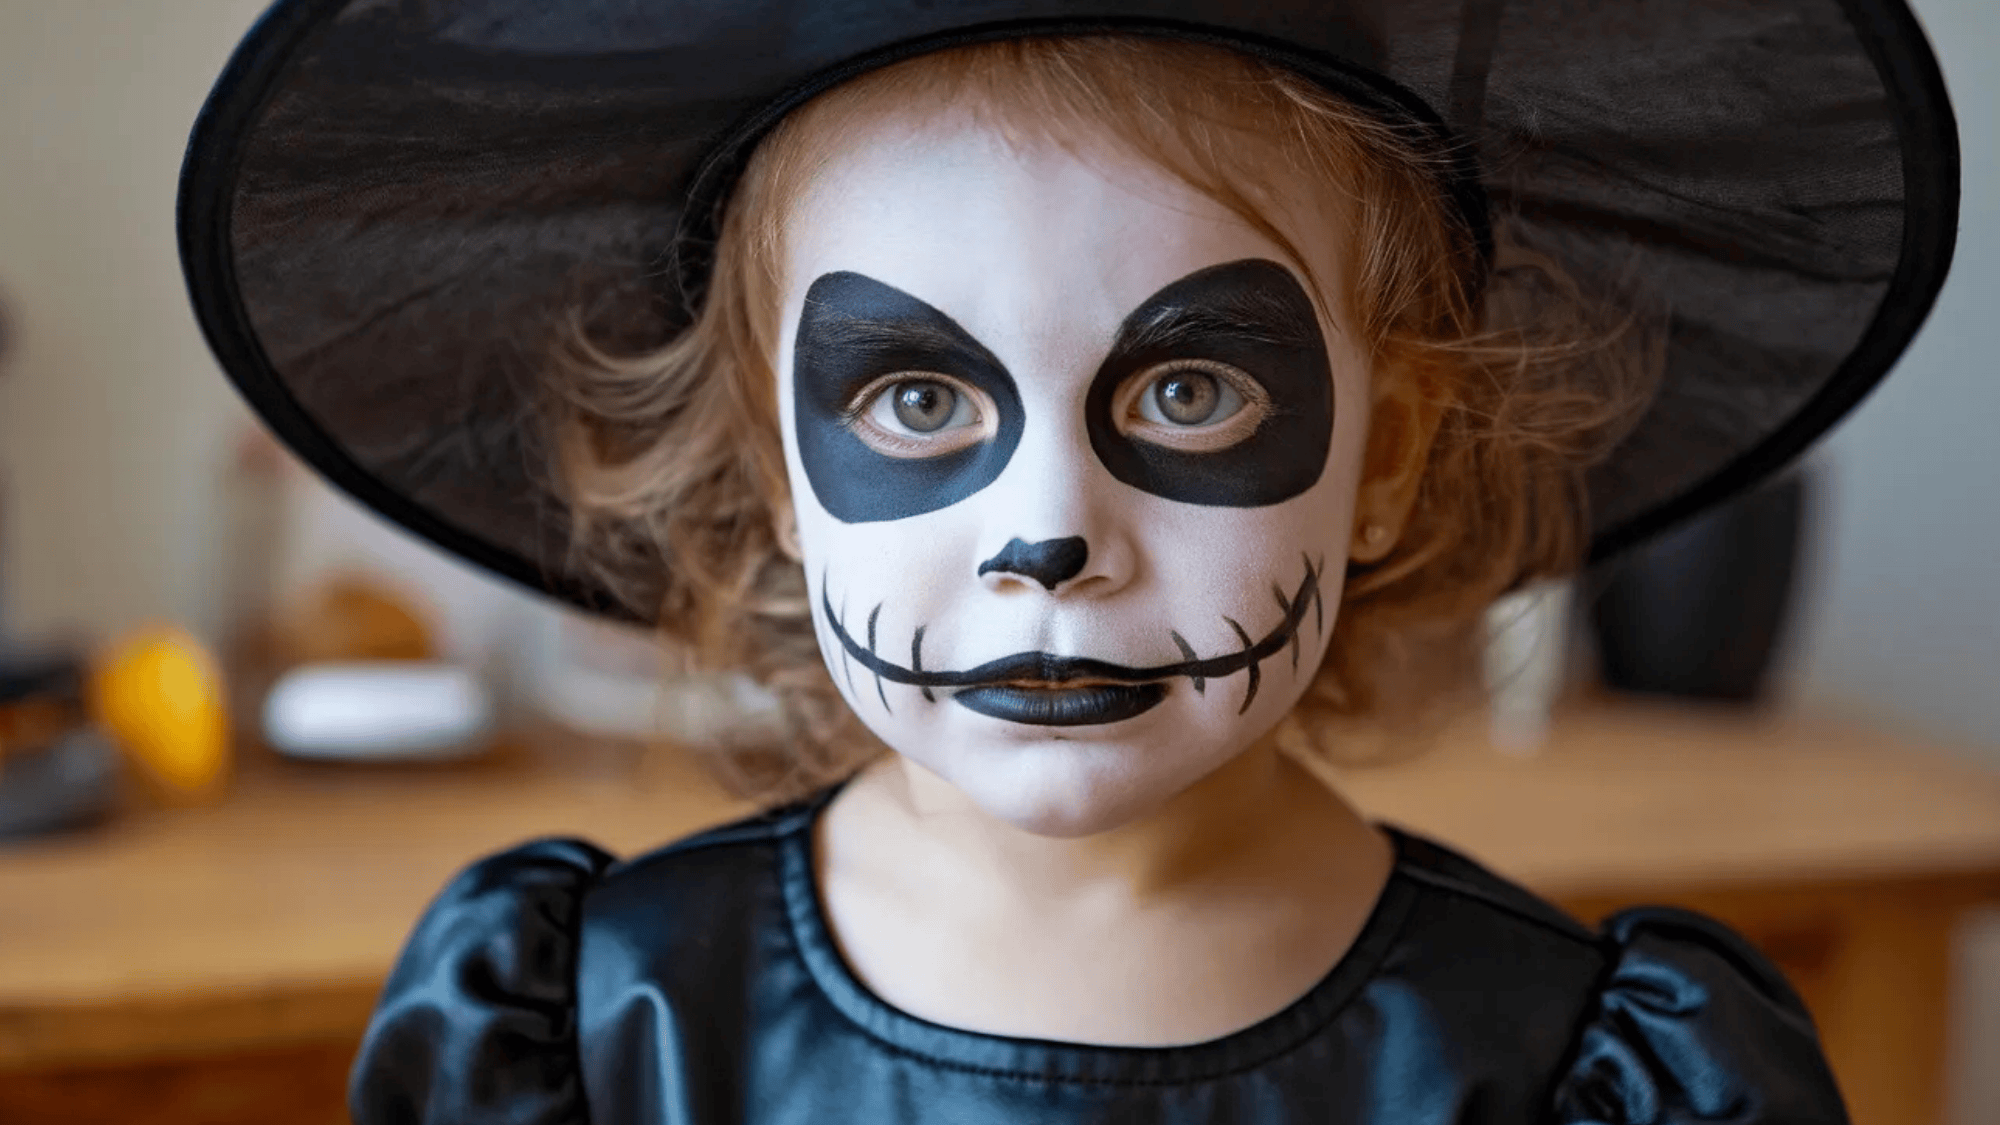
15. Skeleton Face Paint
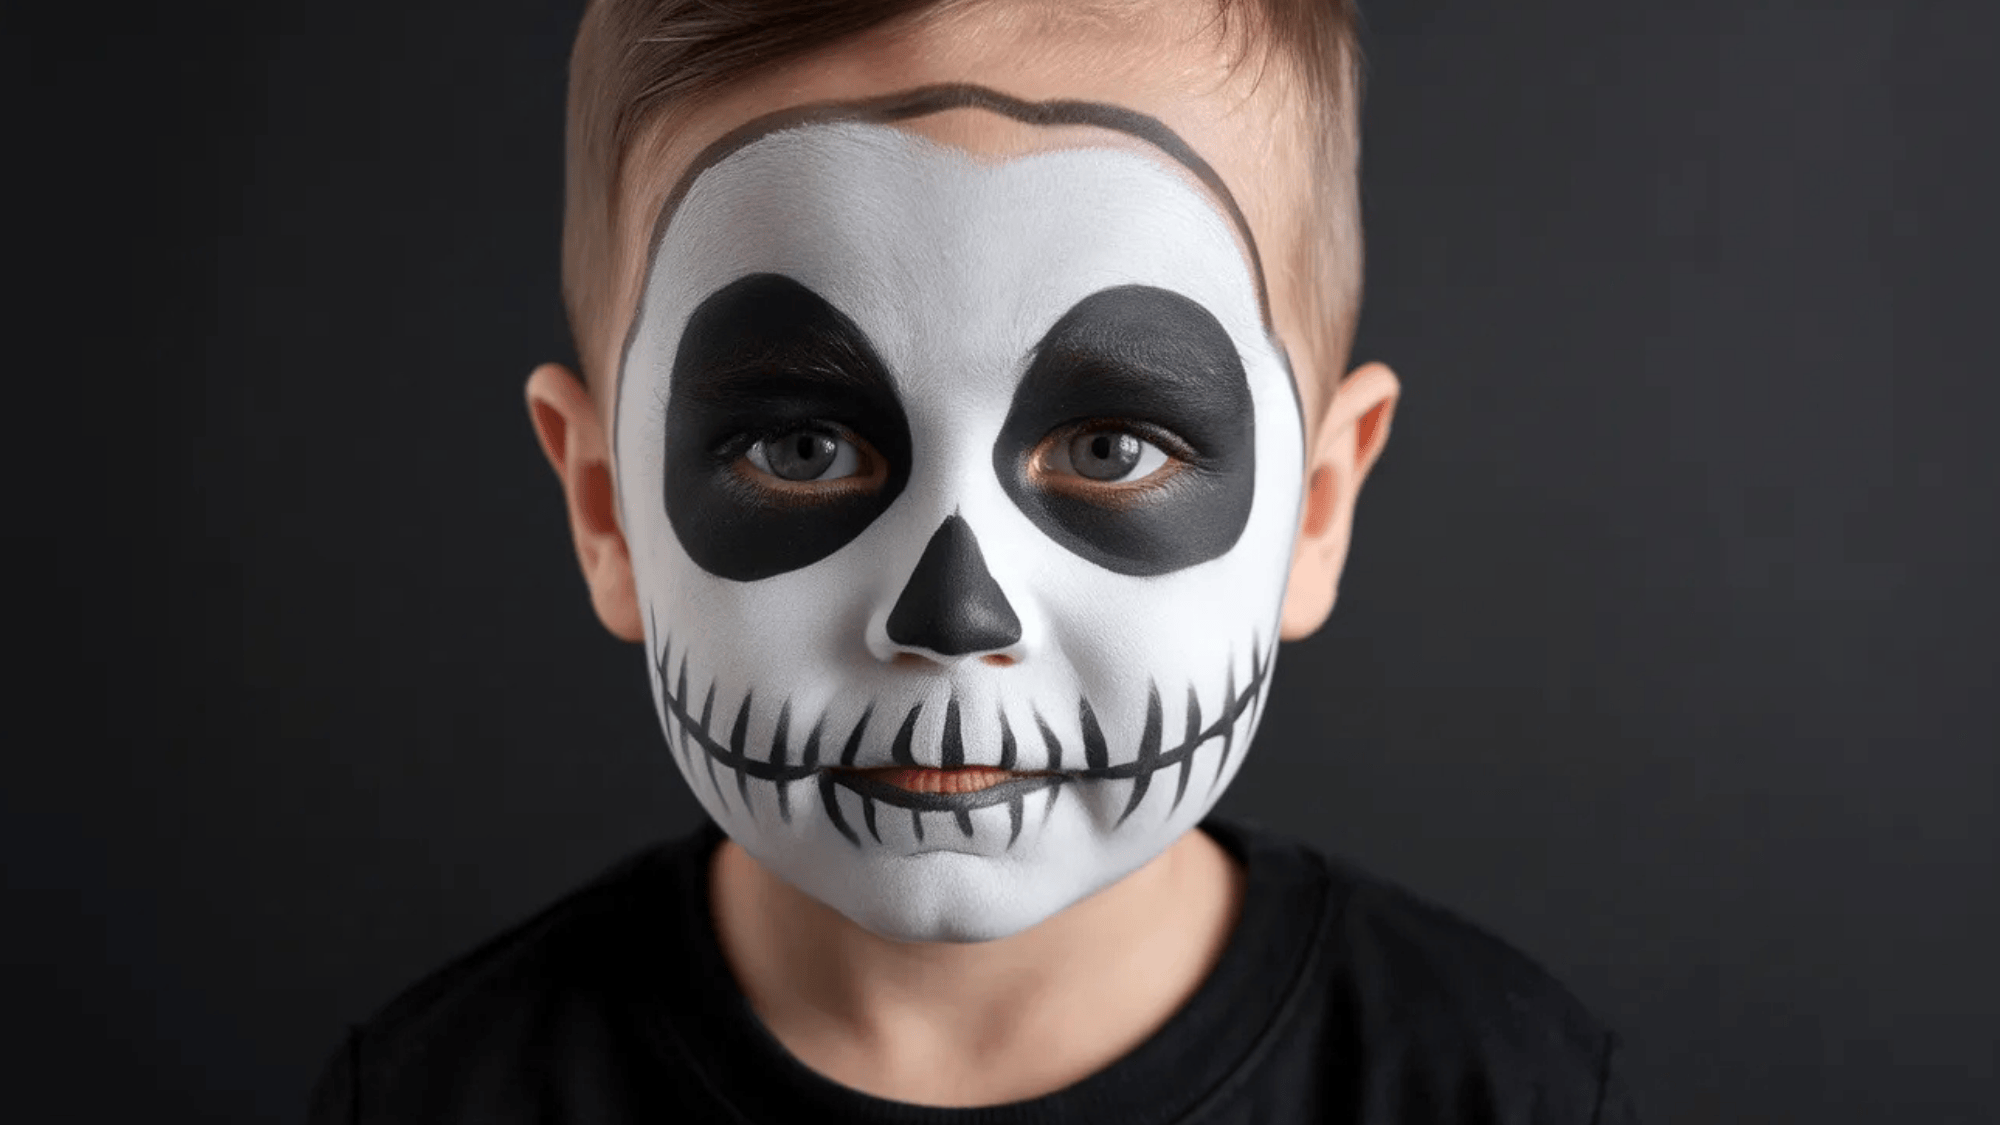
Skeleton face paint is a classic Halloween look that never goes out of style. It’s bold, dramatic, and looks incredibly striking even when done. The contrast of black and white does most of the work, so even beginners can pull this one off well.
- Sponge a white base across the entire face
- Paint large black ovals around both eyes to create hollow eye socket shapes
- Draw a wide nose triangle in black over the natural nose
- Paint vertical lines across the lips to create a stitched-mouth effect
- Add cheekbone cracks or jaw outline details using a fine-liner
Tip: Softening the edges of the eye sockets with a slightly gray shade makes the hollows look more three-dimensional and realistic.
16. Rainbow Face Paint
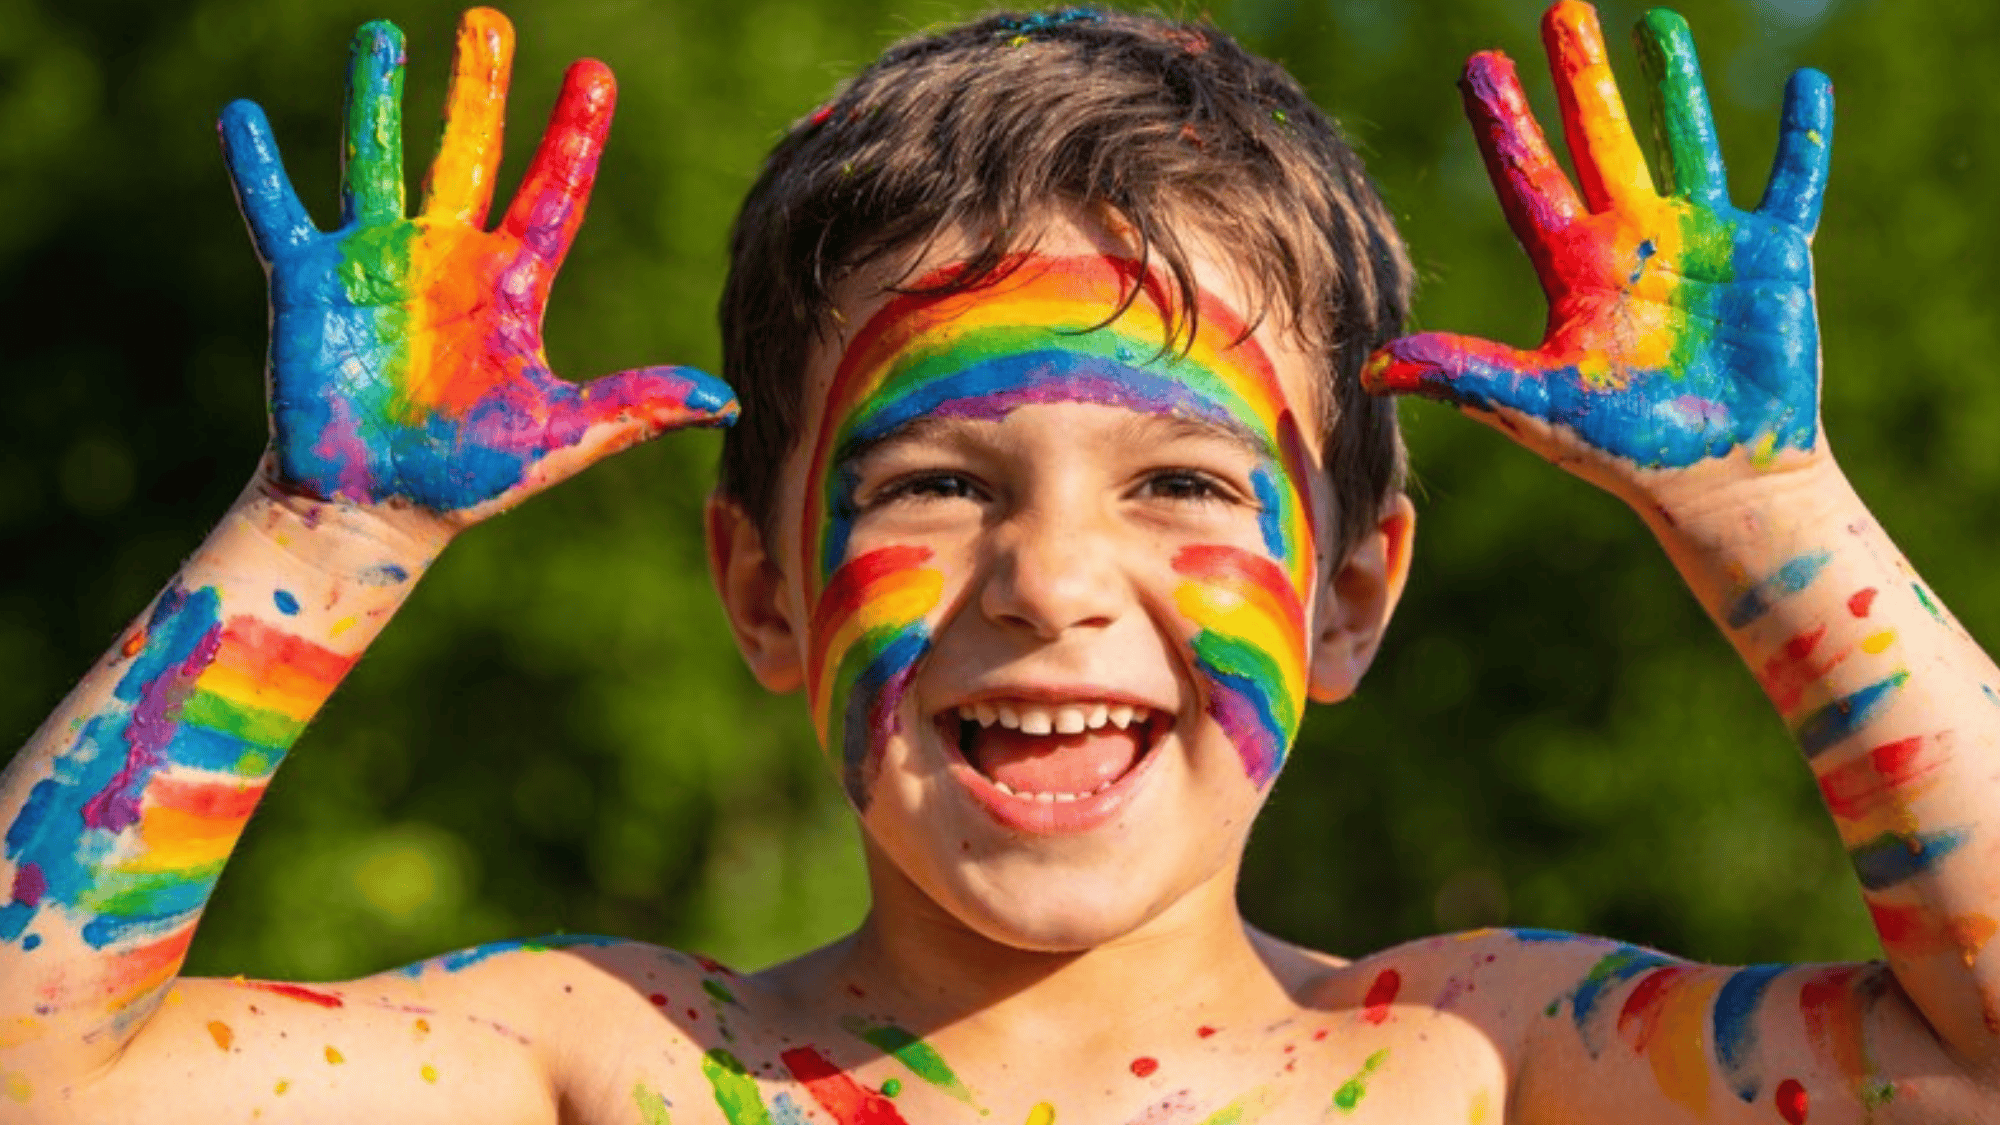
Rainbow face paint is cheerful, colorful, and one of the most straightforward designs on this list. It works for any event and suits people of all ages. The arc of colors across the cheek is iconic, and you can make it as simple or as detailed as you like.
- Use a flat brush to paint a curved red arc across one cheek
- Layer orange, yellow, green, blue, and purple arcs below the red, following the same curve
- Keep each stripe roughly equal in width
Tip: Dampen the brush slightly between colors to keep the stripes smooth and prevent patchiness.
17. Bumble Bee Face Paint
Bumblebee face paint is bright, fun, and easy to execute. The yellow-and-black combination is instantly recognizable, and adding small wing details on the cheeks really completes the look. It’s a great option for younger kids because it comes together quickly.
- Sponge a yellow base across the nose, cheeks, and forehead
- Use a flat brush to paint horizontal black stripes across the cheeks and forehead
- Paint a small black and yellow striped body on the nose
Tip: Keep the stripes wide and bold for younger kids; thinner stripes work better for older children who can sit still longer.
18. Panda Face Paint
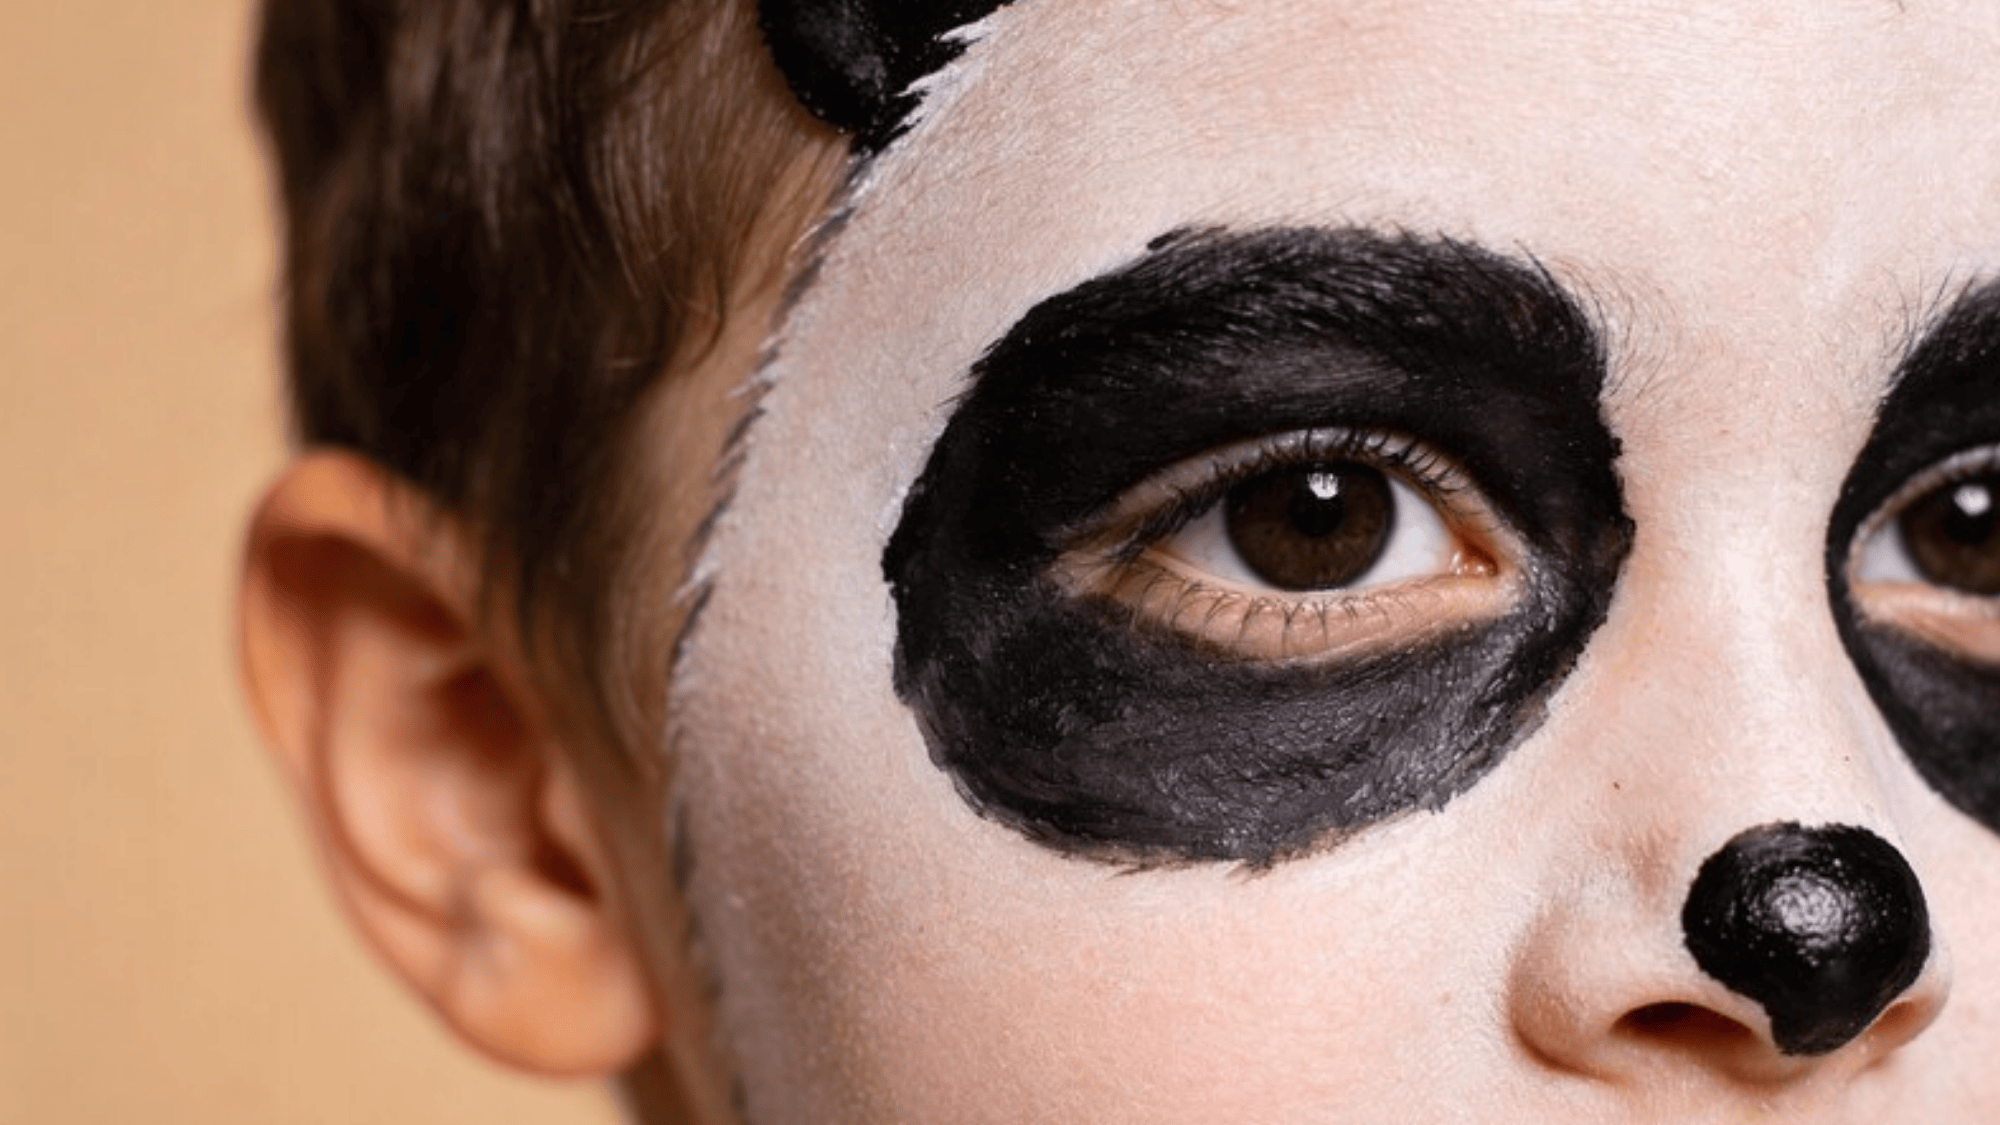
Panda face paint is adorable, simple, and always gets a great reaction. Black and white are the only colors you need, which makes it one of the most beginner-friendly designs on this list. The large eye patches are the defining feature and take only a minute to paint.
- Sponge a white base across the full face
- Paint large black ovals around both eyes using a flat brush
- Add small, rounded black ears on the upper forehead
- Paint a black nose on the tip of the nose
Tip: Softening the edge of the eye patches with a damp sponge gives them a rounder, fluffier look that suits the panda’s character perfectly.
19. Fox Face Paint
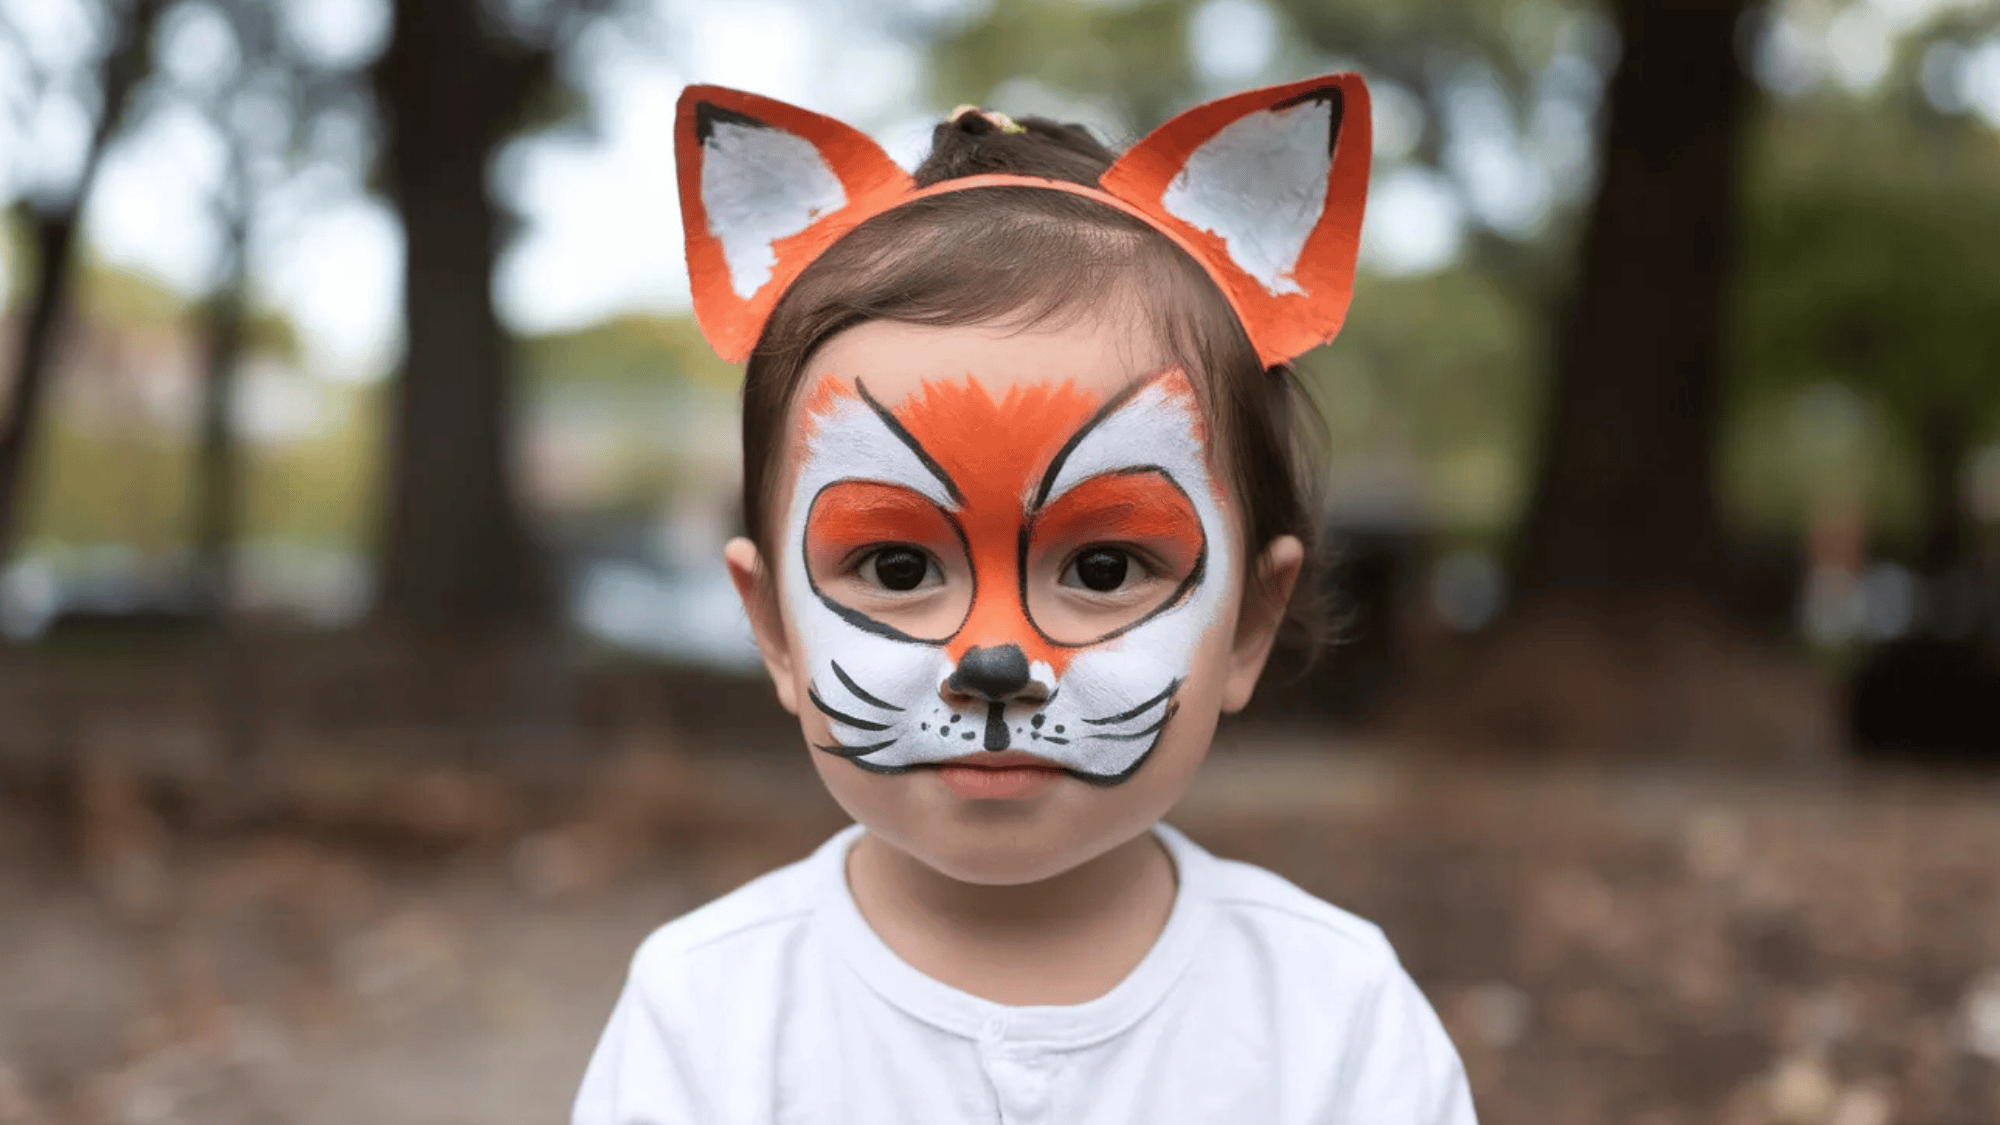
Fox face paint is warm, clever-looking, and a little underrated compared to the more popular animal designs. Burnt orange, white, and black are all you need, and the pointed snout detail makes it immediately recognizable. It’s a great choice for kids who want something a little different.
How to make it:
- Sponge a burnt orange base across the forehead, nose, and cheeks
- Paint white patches around the muzzle area and inner cheeks
- Draw a pointed snout shape on the nose in black
- Add thin black whisker lines and outline details using a fine-liner
Tip: Blending a little dark brown into the outer cheeks and forehead adds depth and makes the orange tones feel richer.
20. Flower Face Paint
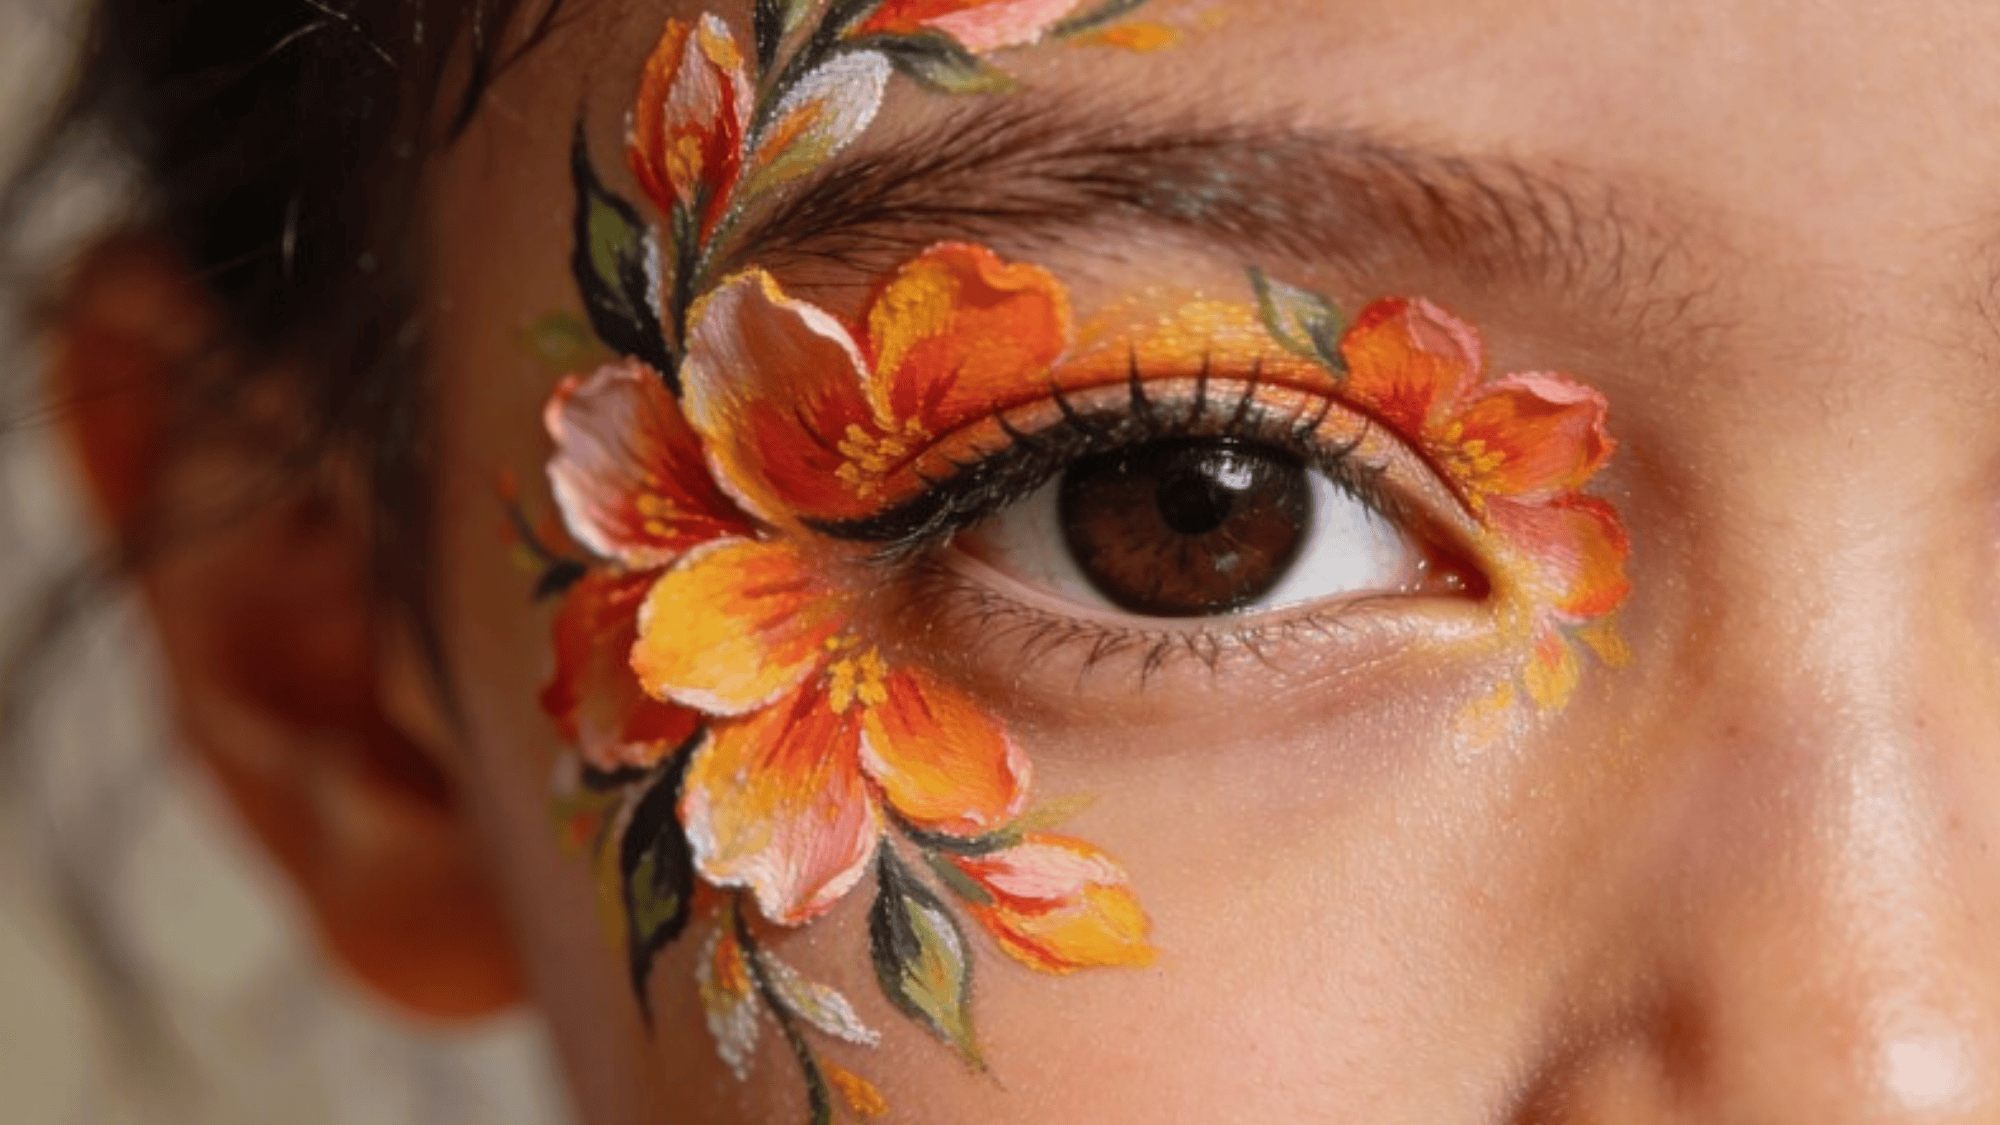
Flower face paint is soft and pretty. You can paint a single large bloom on the cheek or scatter smaller flowers across the whole face. It works in any color combination and suits kids of every age, making it a reliable go-to design.
- Paint rounded petal shapes in a circle around the eyes
- Add a second layer of slightly smaller petals in a contrasting color on top
- Add small leaf shapes beside the flower using green
- Scatter additional small flowers or dots across the cheeks or temples if desired
Tip: Using a dotting tool or the end of a brush handle for the petal centers gives a cleaner, more precise result than a brush tip.
21. Galaxy Face Paint
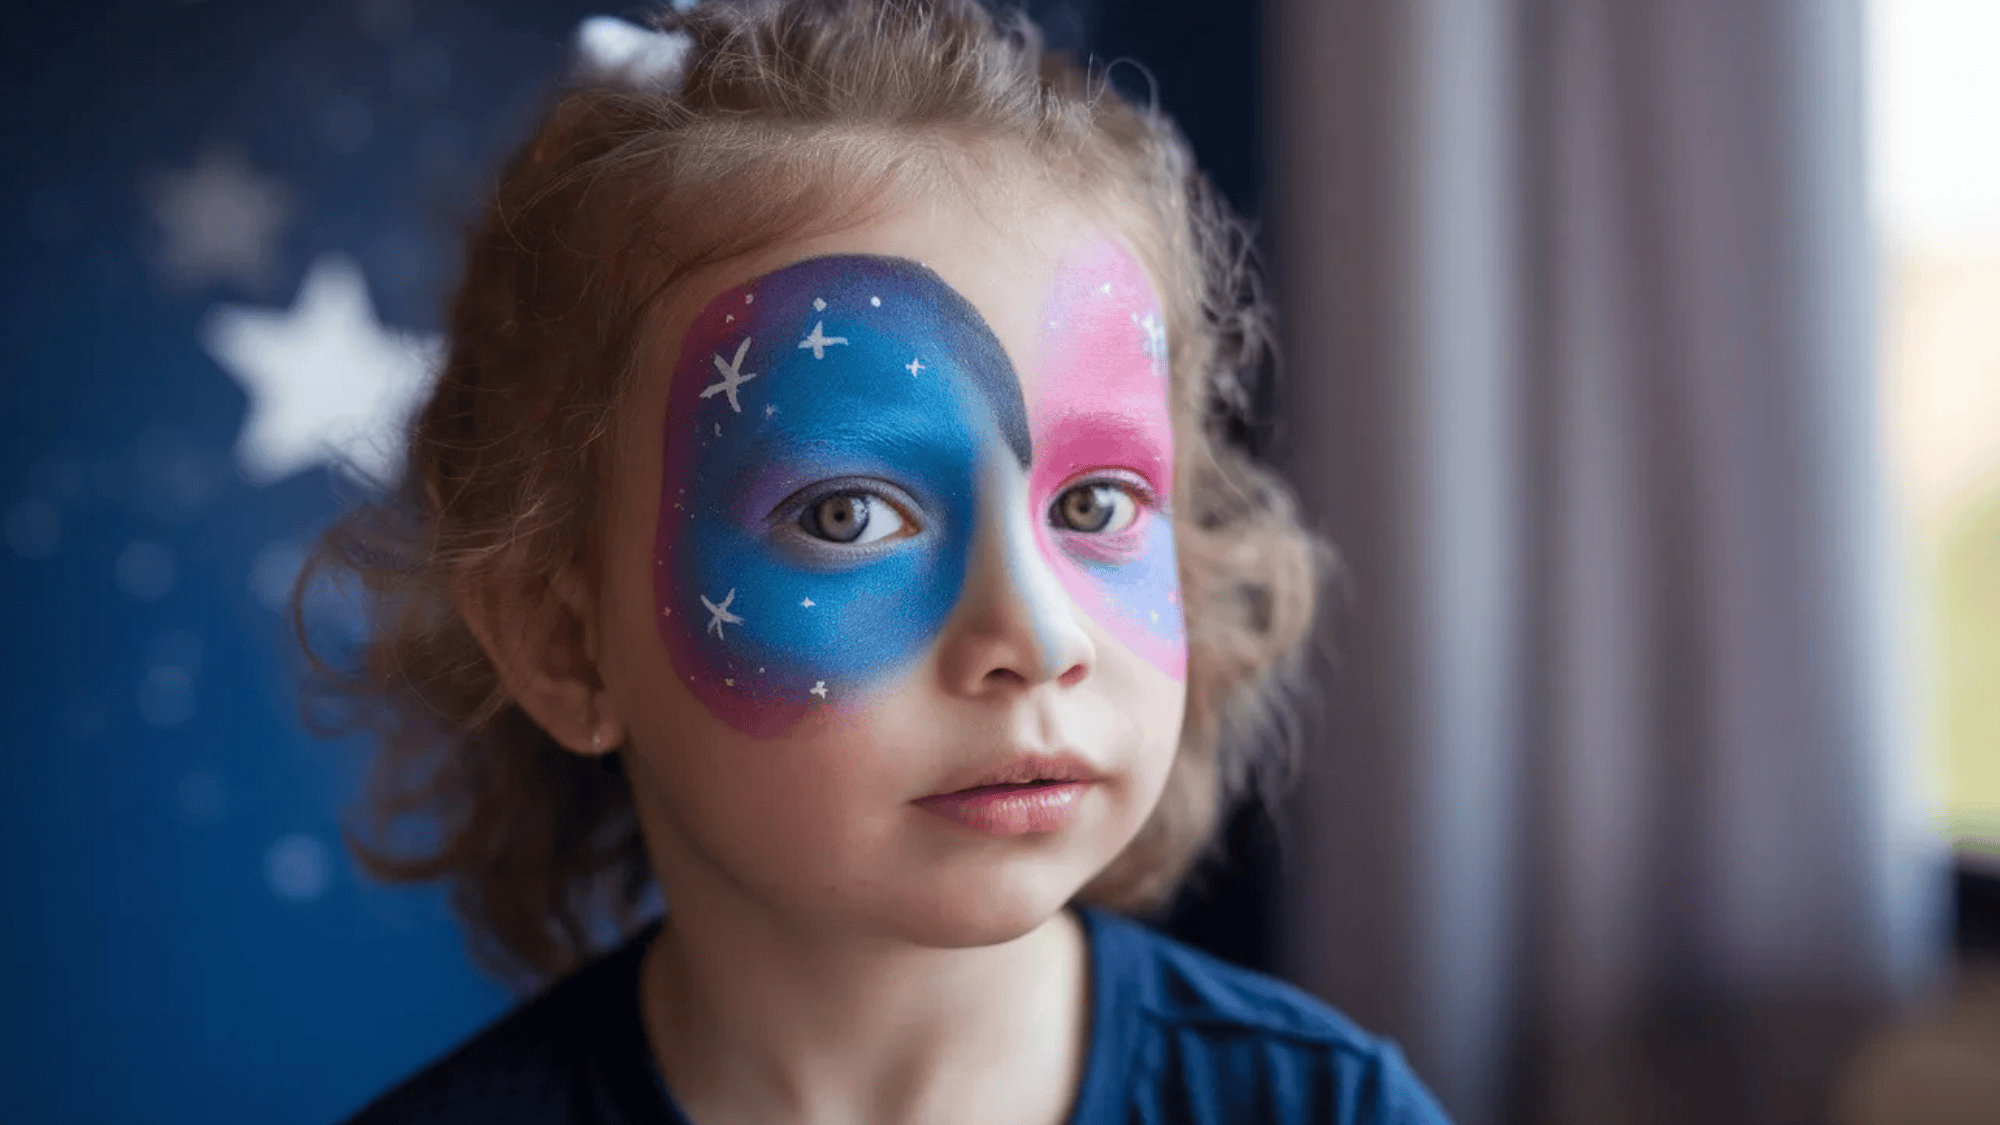
Galaxy face paint looks incredibly complex, but it is actually one of the most forgiving designs you can do because the whole point is to look blended and abstract. Deep blues, purples, and blacks, with scattered white stars, create a stunning effect that kids and adults alike love.
- Sponge deep blue, purple, and black across the face in overlapping patches
- Blend the colors where they meet using a damp sponge
- Add white star shapes scattered across the design using a fine-liner or dotting tool
- Dab small white dots across the whole face to suggest a star field
- Add a streak of silver or white across the design to suggest a galaxy arm
Tip: Cosmetic glitter or iridescent pigment dabbed lightly over the finished design takes the galaxy effect to another level.
22. Clown Face Paint
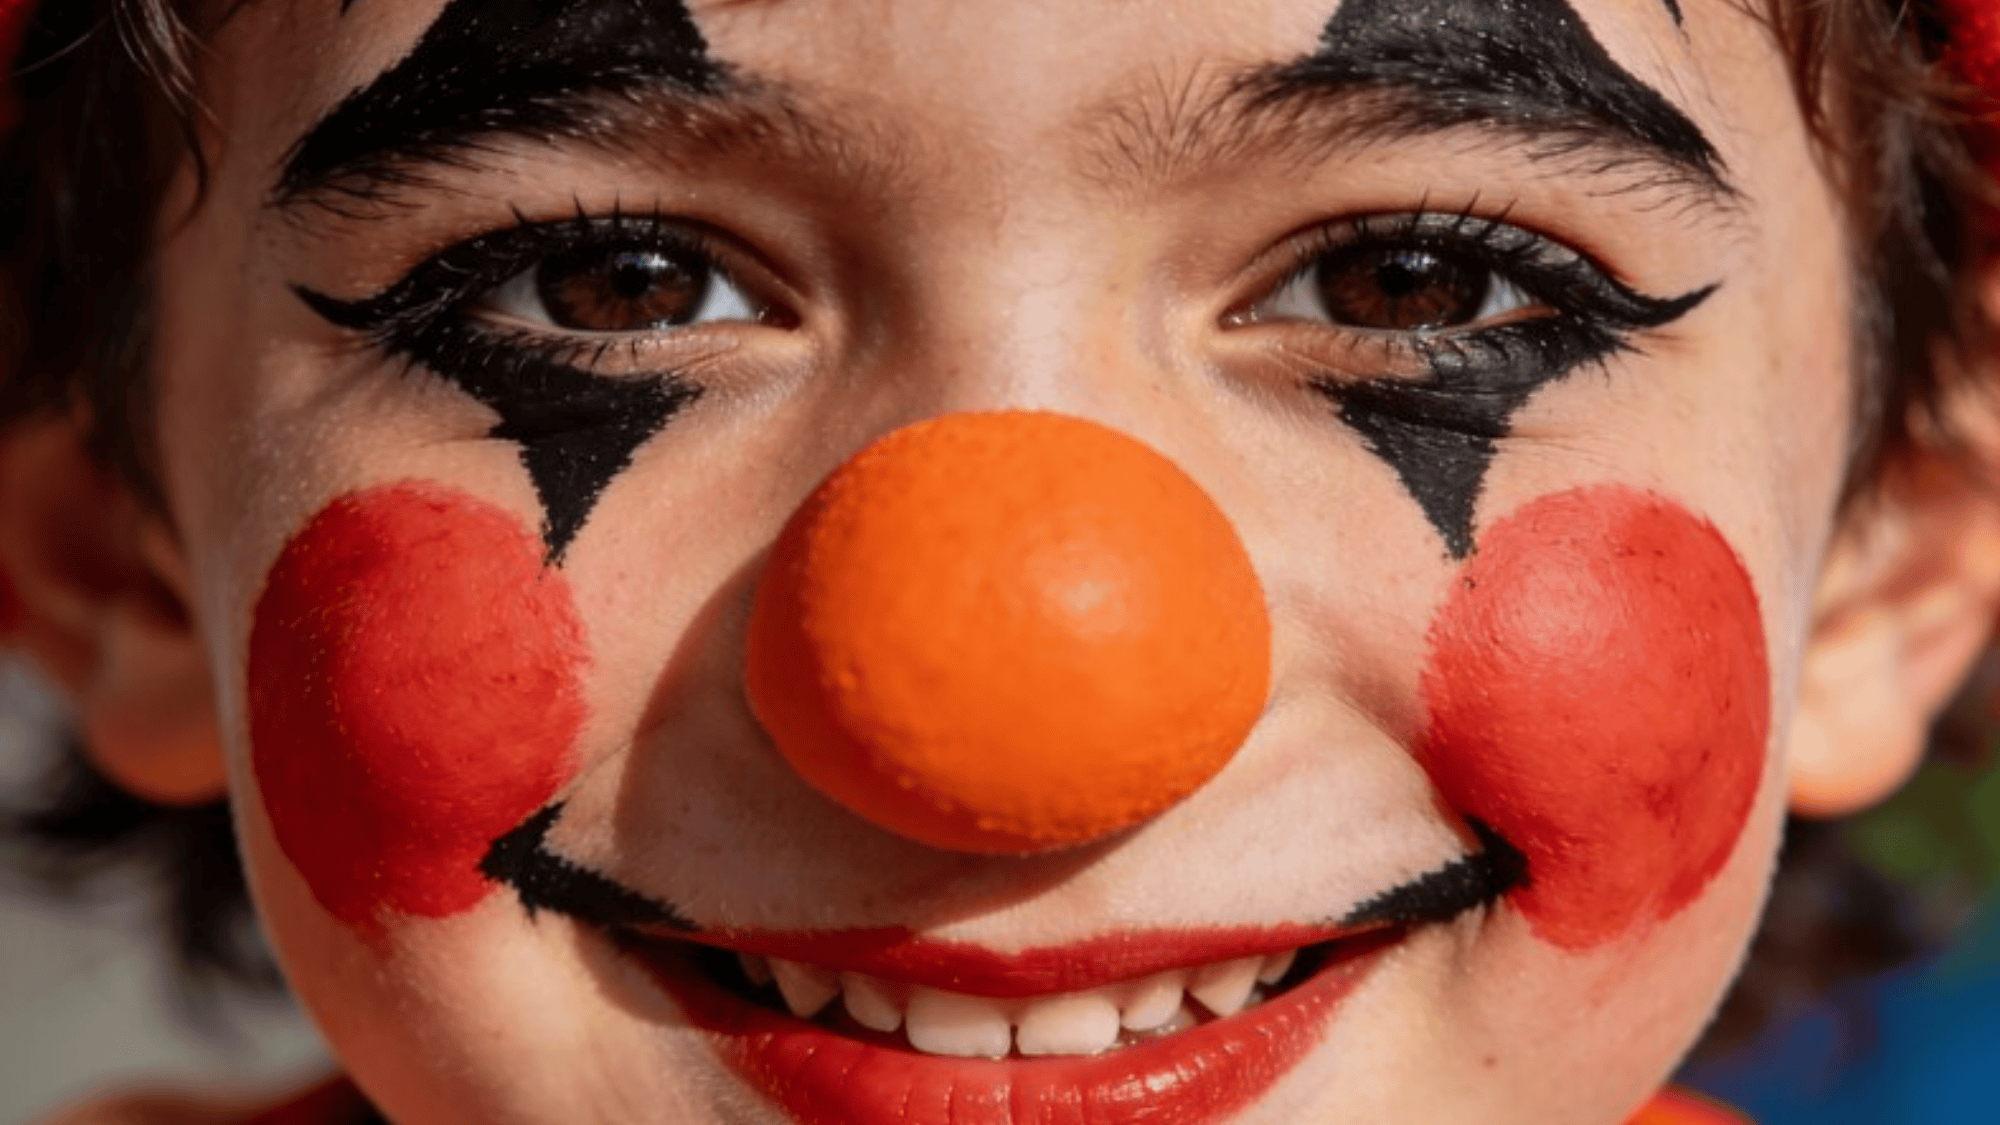
Clown face paint is a classic for a reason. It’s colorful, expressive, and gives you plenty of room to play with different looks. A friendly clown design with a big smile and rosy cheeks is always a hit and one of the more forgiving for beginners.
- Paint large red or pink circles on each cheek using a round sponge
- Draw an exaggerated smiling mouth in red, extending beyond the natural lip line
- Add a red circle on the tip of the nose
- Use bright colors to paint triangular or star shapes above and below the eyes
Tip: Keeping the colors bold and the shapes large makes the design read better from a distance, which is especially useful at events and parties.
23. Flamingo Face Paint

Flamingo face paint is bright, fun, and a little unexpected, which is exactly why kids love it. The pink tones are striking, and the beak detail on the nose ties the whole look together. It’s a great choice for spring or summer events and works especially well with glitter.
- Sponge a soft pink base across the cheeks and forehead
- Deepen the color around the outer cheeks and temples with a darker pink or coral
- Paint a curved beak shape on the nose using yellow and black
- Add a feather pattern on the cheeks using a fine-liner in a slightly darker pink
Tip: Adding a white shimmer highlight down the center of the face makes the pink tones appear more vibrant against it.
24. Ladybug Face Paint
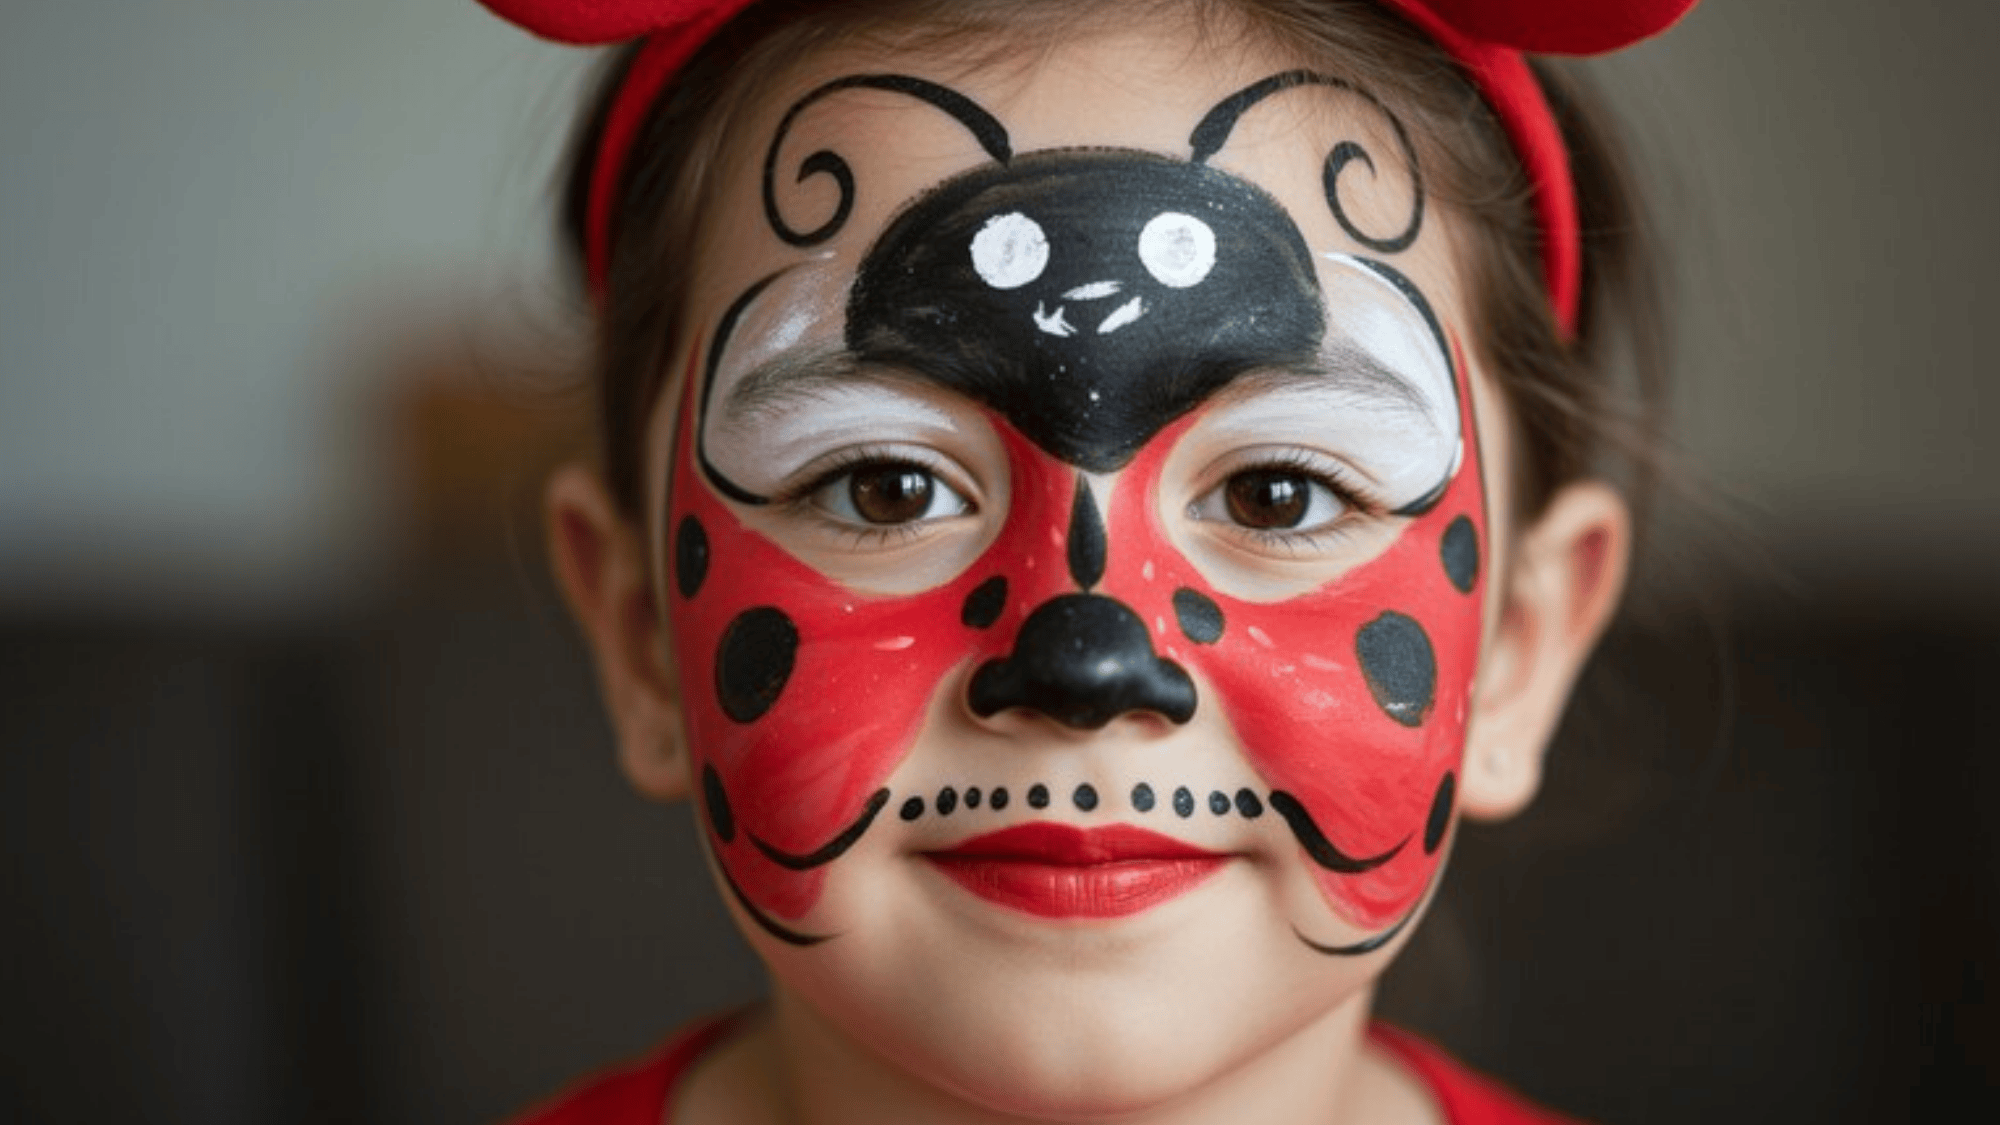
Ladybug face paint is cute, bright, and simple enough for any skill level. Red and black are the only colors you really need, and the round spot pattern does most of the visual work. It’s a quick design that always gets a great reaction from younger kids.
- Sponge a bold red base across the cheeks and nose bridge
- Paint a black stripe down the center of the nose to suggest the body division line
- Add large black circle spots across the cheeks using a round brush
- Paint a small curved black head shape on the forehead
- Add small antennae lines extending from the forehead
Tip: Varying the size of the spots slightly makes the design look more natural and less rigid.
25. Star and Moon Face Paint
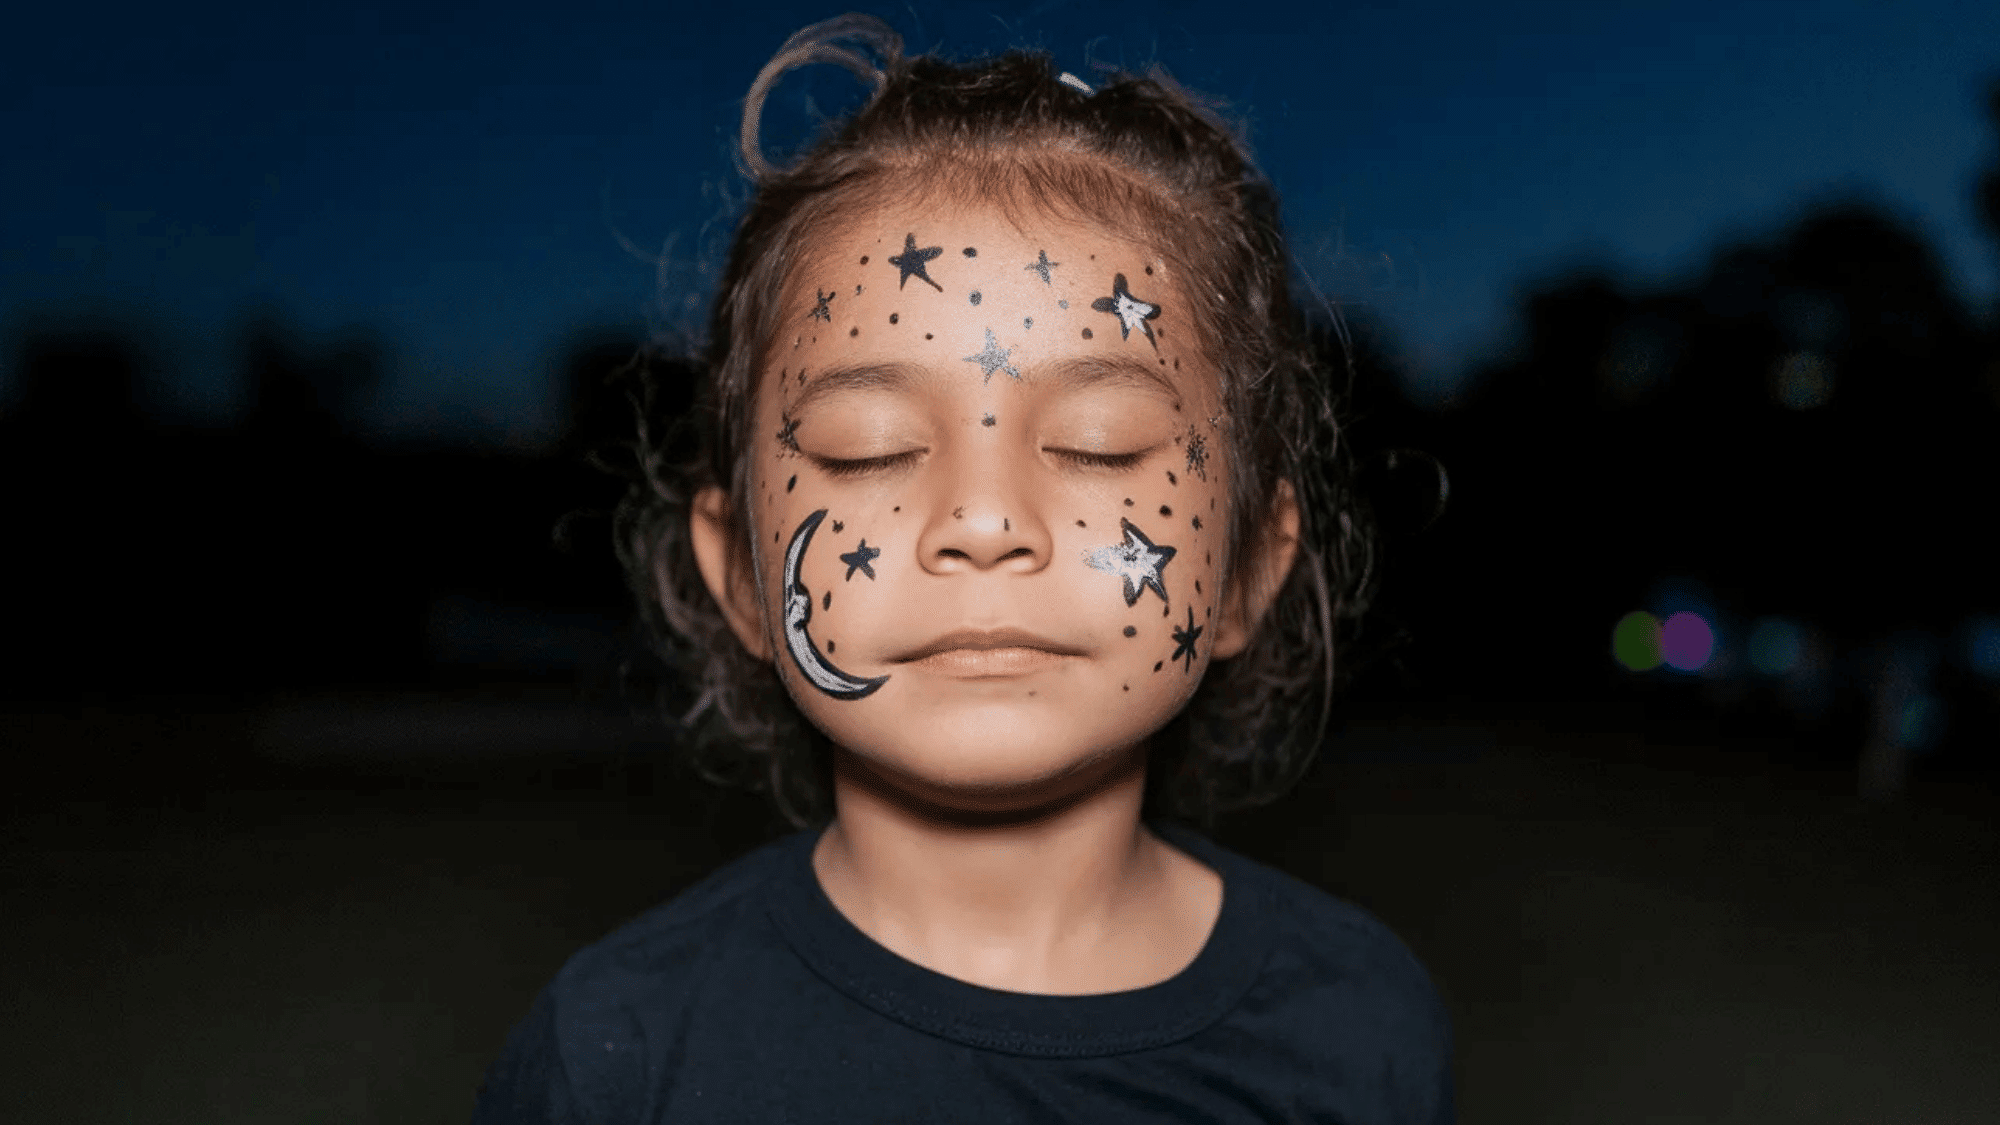
Star and moon face paint is simple, magical, and works beautifully as either a full-face design or a subtle accent look. It’s one of the quickest designs on this list and suits kids who want something a little more understated but still eye-catching.
How to make it:
- Paint a crescent moon shape on one cheek or the forehead
- Outline the moon with a fine-liner for clean edges
- Scatter star shapes in different sizes around the moon using the same color
- Add smaller dot stars across the temples and brow area
Tip: Using a star-shaped stencil speeds things up significantly and gives perfectly consistent shapes every time.
26. Alien Face Paint
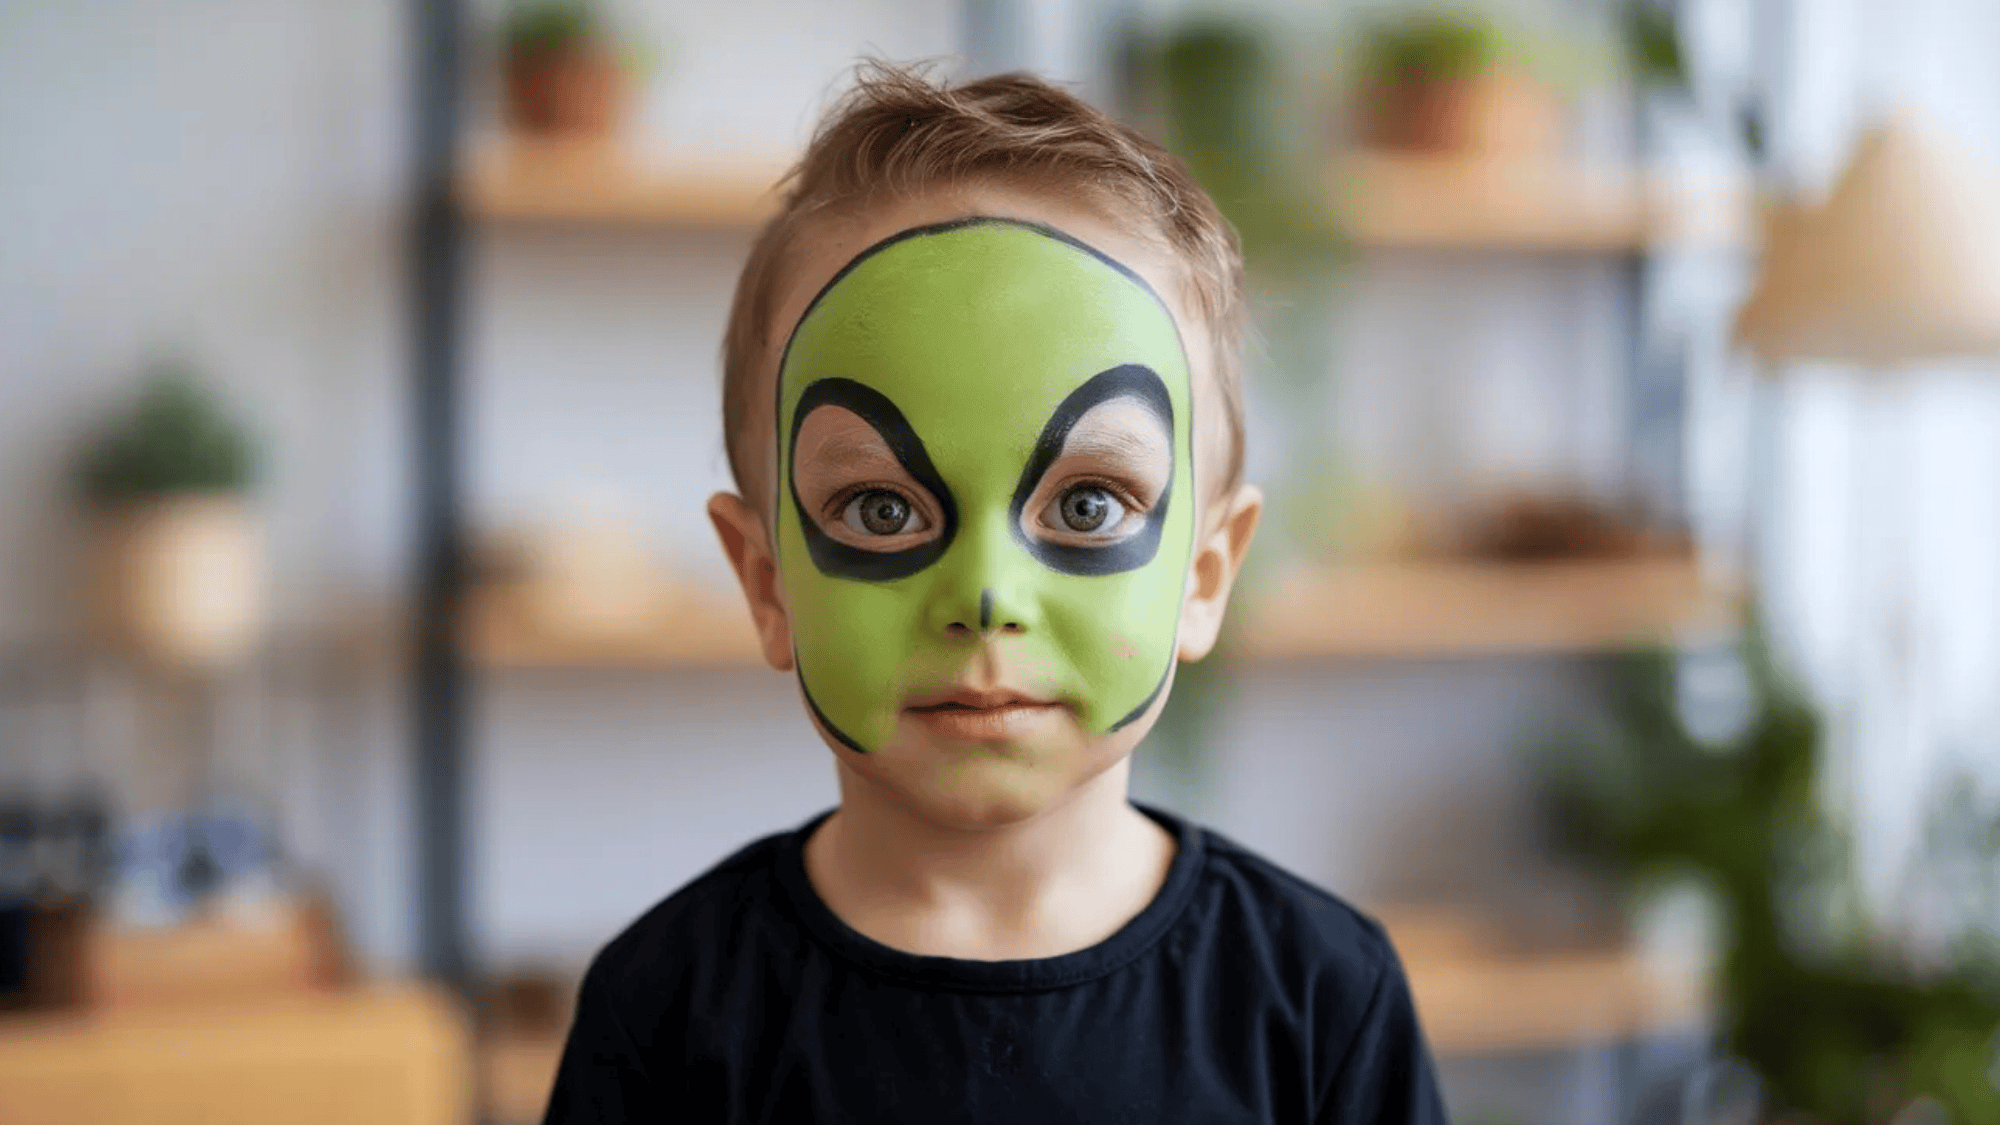
Alien face paint gives kids the chance to get truly creative, since there’s no single right way an alien is supposed to look. Bold greens, blues, and purples are the go-to palette, and the more unusual and unexpected the details, the better the result tends to look.
- Sponge a green or teal base across the full face
- Paint large, exaggerated almond-shaped eyes in black or dark purple over the brow area
- Add alien marking details like lines or geometric patterns across the forehead and cheeks
Tip: Mixing two base colors, like green and blue, and blending them on the face gives the skin an otherworldly, iridescent quality.
27. Wolf Face Paint
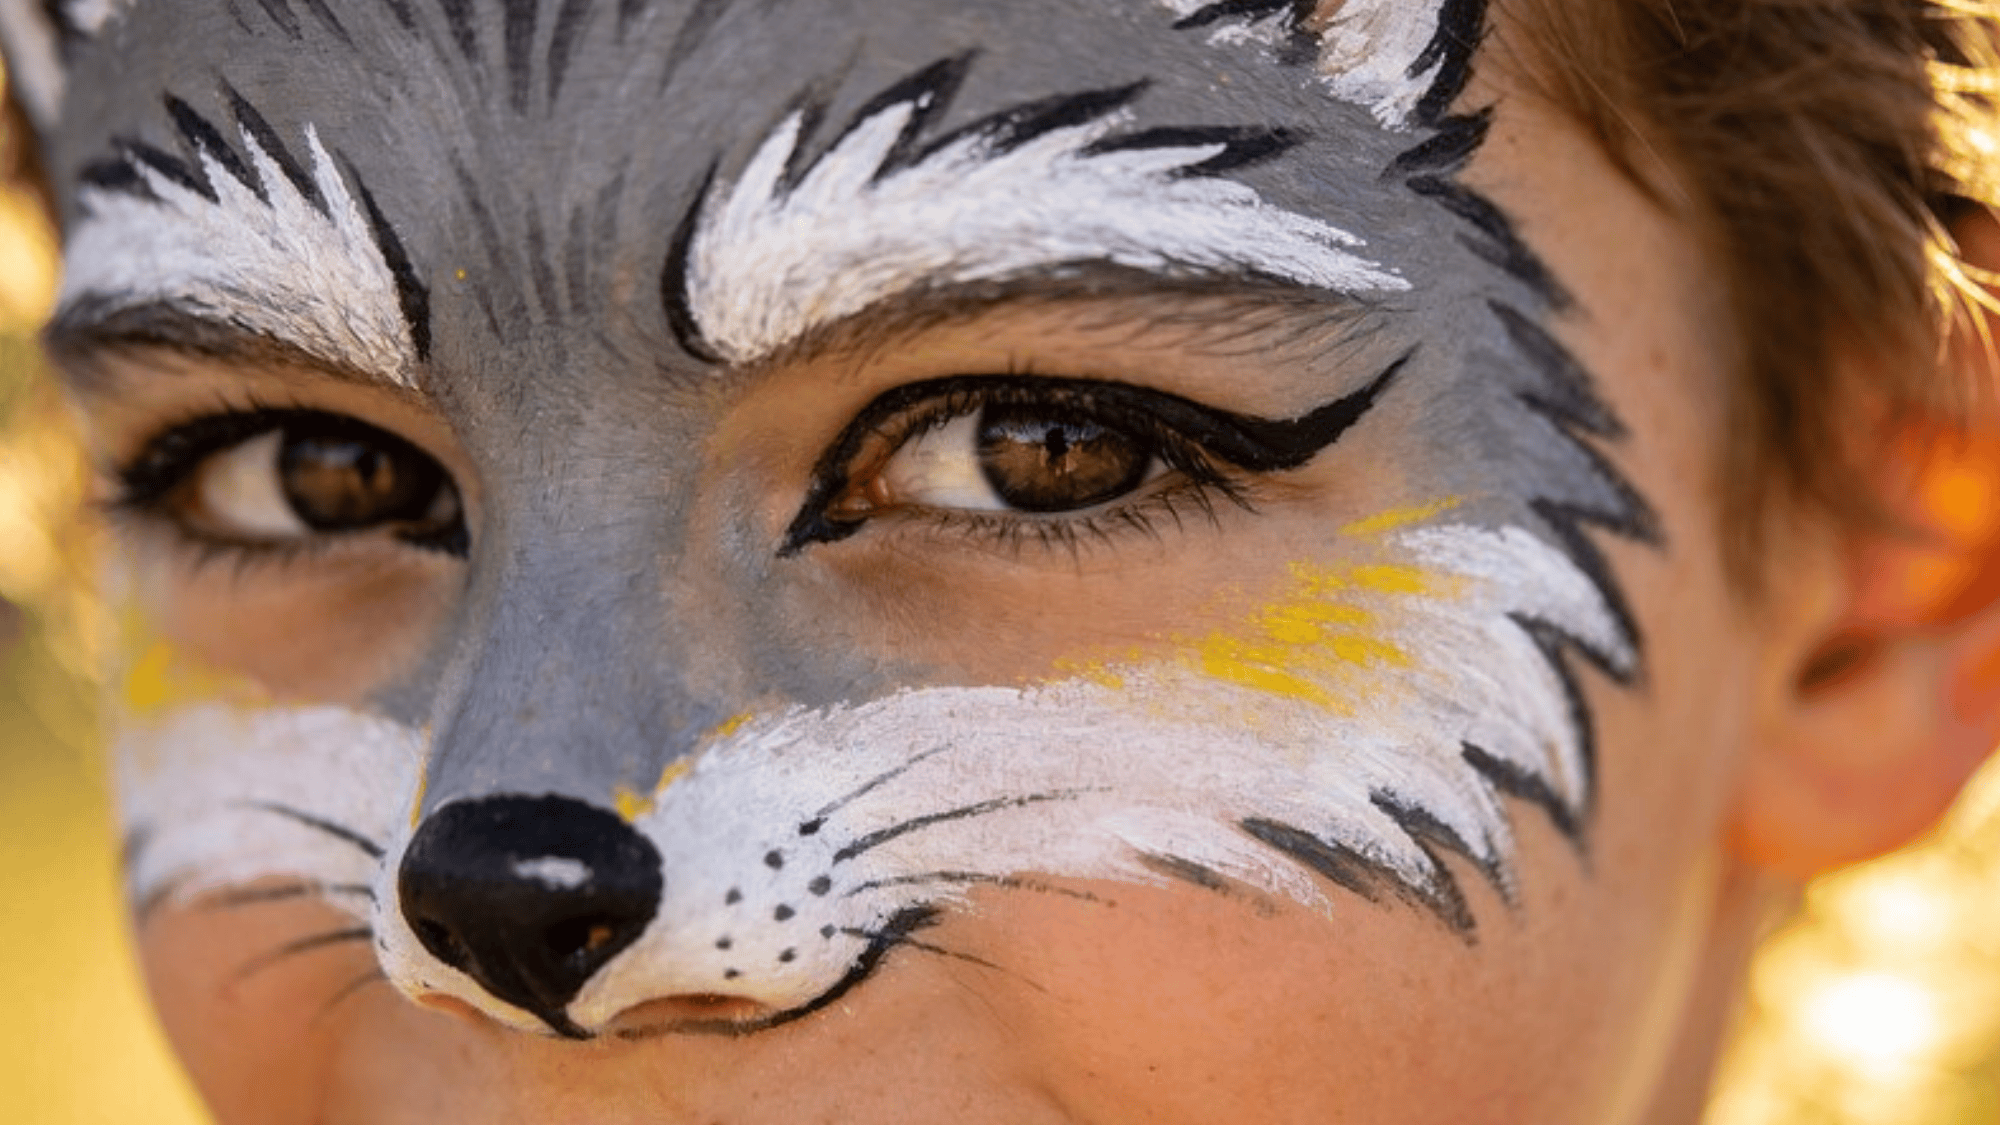
Wolf face paint is dramatic, detailed, and one of the most impressive designs on this list when done well. Gray tones, subtle fur texture, and piercing eye details make it instantly striking. It suits older kids who want something bold and a little fierce.
How to make it:
- Sponge a gray base across the full face, adding lighter tones around the muzzle and chin
- Use a flat brush to paint darker gray patches around the eyes and outer face
- Add fur-like strokes using a fine-liner brush in dark gray and black across the cheeks and forehead
- Paint a dark snout and nose on the lower face
- Add sharp, angular brow details and fang hints at the corners of the mouth
Tip: Layering three different shades of gray, light, mid, and dark, creates a far more realistic fur texture than using a single flat color.
More Easy Face Paint Ideas to Try
If you’re looking for even more creative options, there are plenty of simple designs to try. These face paint ideas are quick to create and sure to bring smiles, whether it’s for a party or just for fun.
- Leopard print – Bold spots and a painted nose make this one quick and eye-catching
- Elephant – Soft grays and a curved trunk work beautifully for younger kids
- Bunny – Pink nose, whiskers, and floppy ear details keep this one sweet and simple
- Frog – Big, round eyes and bright green make this a crowd favorite
- Owl – Circular eye designs and feather details come together fast
- Shark – Blue-gray base with jagged teeth painted across the chin
- Penguin – Black and white with a pop of orange for the beak area
- Parrot – Colorful feathers sweep around the eyes and cheeks
- Dragon – Scales along the forehead and cheeks with bold eye details
- Phoenix – Warm reds and oranges swept upward from the cheeks
- Fairy – Soft glitter, delicate wings on the cheeks, and pastel tones
- Elf – Pointed ear designs, rosy cheeks, and a green accent color
- Witch hat and stars – Minimal but striking, great for Halloween events
- Jack-o’-lantern – Orange base with carved pumpkin features around the mouth
- Bat – Simple black bat wings spread across the cheeks and nose bridge
- Frankenstein – Green base, stitches on the forehead, and bold dark brows
- Vampire – Pale base, dramatic brows, and fangs on the lower face
- Werewolf – Brown fur streaks, a dark snout, and intense brow details
- Candy corn – Yellow, orange, and white stripes for a fun Halloween look
- Snowflake – White and icy blue geometric patterns across the forehead and cheeks
- Reindeer – Brown base, a red nose, and simple antler details on the forehead
- Christmas tree – Green triangular design on the forehead with tiny ornament dots
- Santa – Rosy cheeks, a fluffy white beard outline, and a red hat above the brow
- Easter egg – Pastel swirls and dotted patterns covering the cheeks
- Chick – Yellow and orange with a small beak on the nose
- Spring flowers – Light petals scattered across the cheeks and temples
- Heart – A single bold heart on the cheek, quick and always a hit
- Stars – Scattered metallic or glitter stars across the face
- Rainbows and clouds – Arching rainbow design with small white cloud details
- Sun design – Golden circle on the forehead with radiating lines
- Moon and stars combo – Crescent moon on one cheek, stars scattered around
- Lightning bolt – Simple and bold, inspired by classic rock and fantasy looks
- Flames – Red and orange licks of fire rising from the jaw or forehead
- Tribal pattern – Geometric lines and shapes across the cheeks and forehead
- Neon splatter – Bright paint flecks across a white or black base for a funky effect
- Glow-in-the-dark design – UV-reactive paints for nighttime events or parties
- Cheetah print – Similar to leopard but with smaller, more scattered spots
- Peacock feathers – Blue and green feather details fanning out from the eye area
- Toucan – Bold beak on the nose and bright tropical colors across the cheeks
- Chameleon – Swirling greens and teals with a curling tail detail on the cheek
- Sea turtle – Shell pattern on the forehead and soft green tones overall
- Crab – Red claws painted along the cheeks with beady eyes on the forehead
- Octopus – Tentacles spreading from the nose outward across the cheeks
- Jellyfish – Soft pinks and purples with trailing lines below the cheekbones
- Stingray – Flat gray-blue wings sweeping across the cheeks
- Narwhal – Soft blue with a spiraling horn detail on the forehead
- Black panther – Dark base with subtle spot details and fierce eye markings
- Chimpanzee – Warm browns with exaggerated eye and mouth details
- Koala – Gray tones, large, round ears suggested near the temples, and a dark nose
- Kangaroo – Warm tan with a pouch detail and long-lashed eyes
- Zebra – Black and white stripes sweeping across the cheeks
- Giraffe – Tan base with brown patch patterns and long lash details
- Horse – Brown or black base with a flowing mane design across the forehead
- Pig – Pink base with a round snout on the nose and small curly tail detail on the cheek
- Cow – White base with black splotches and a soft pink nose
- Sheep – White fluffy texture effect with a soft pink face center
- Robot – Geometric shapes, panel lines, and metallic tones for a mechanical look
- Astronaut helmet – Gray visor outline framing the face with star details around it
- Ninja – Dark eye mask design with minimal but striking detail
- Knight – Gray armor-effect lines framing the face like a helmet visor
- Superhero lightning symbol – A bold symbol painted on the forehead or cheek
- Captain America shield – Circular red, white, and blue design on the cheek
- Iron Man mask – Red and gold geometric eye and jaw design
- Wonder Woman tiara – Gold headpiece design across the forehead with star detail
- Minion – Yellow base, goggles around one or both eyes, and a wide grin
- Elsa inspired – Ice blue tones, snowflake details, and a frosted eye effect
- Moana inspired – Warm tones, ocean wave details, and a floral cheek accent
- Simba – Golden tones, dark ear outlines, and a painted mane around the face
- Stitch-inspired – Blue base, large oval eyes, and small antenna details on the forehead
- Cinderella inspired – Soft blue tones, silver star details, and a delicate crown on the forehead
- Hulk – Bold green base with an intense brow and torn purple accent along the jaw
- Groot – Warm brown bark-like lines across the face with small leaf details on the forehead
Removing Face Paint Safely
Getting the paint off should be just as stress-free as putting it on. The good news is that most face paints, especially water-activated ones, come off easily if you follow the right steps.
Start with a damp cloth or baby wipe to lift most of the paint from the surface. This handles the bulk of the work without requiring any products.
ollow up with a gentle, fragrance-free cleanser to clear away any remaining residue, and let the water do the heavy lifting. Avoid scrubbing, since rubbing too hard can irritate a child’s skin, especially around the eye area.
For glitter paints, a soft makeup remover pad works much better than a cloth, helping prevent tiny glitter particles from scratching the skin.
Conclusion
Face painting doesn’t have to be intimidating. With the right supplies, a little practice, and a list of easy face painting ideas for kids to pull from, anyone can create designs that genuinely impress.
Start with the simpler ones, get comfortable with the tools, and work your way up. Every design gets easier the second time around, and kids are far more forgiving than most people expect.
The best part? There’s no single right way to do any of these. A tiger that looks a little more like a cat is still a win when a child sees their reflection and lights up.
Now grab a brush and get started.